What is relief carving? It is about setting different levels of depth on a flat wood surface. You carve away material so that certain areas stand out more than others, creating a three-dimensional design.
This art form has a rich history dating back to ancient Egypt, when the technique was used to decorate tombs and temples. Later, during the medieval period, it was employed to embellish churches, cathedrals, and royal palaces.
Wood relief carving continues to spark interest today because it adds a personal touch to every piece and helps develop a keen sense of perspective. Relief carving creates texture and tactile surfaces, making the artwork more engaging. Most importantly, it boosts creativity, as you can tell an entire story through relief carving patterns.
Beginners may be hesitant to start, but the good news is that we’ve put together all the nuts and bolts you need to take on relief wood carving. By reading this guide to the end, you’ll learn about the essential tools, the best wood to begin with, key carving techniques, and how to finish and protect your artwork. Let’s dive in!
Essential Tools for Relief Carving
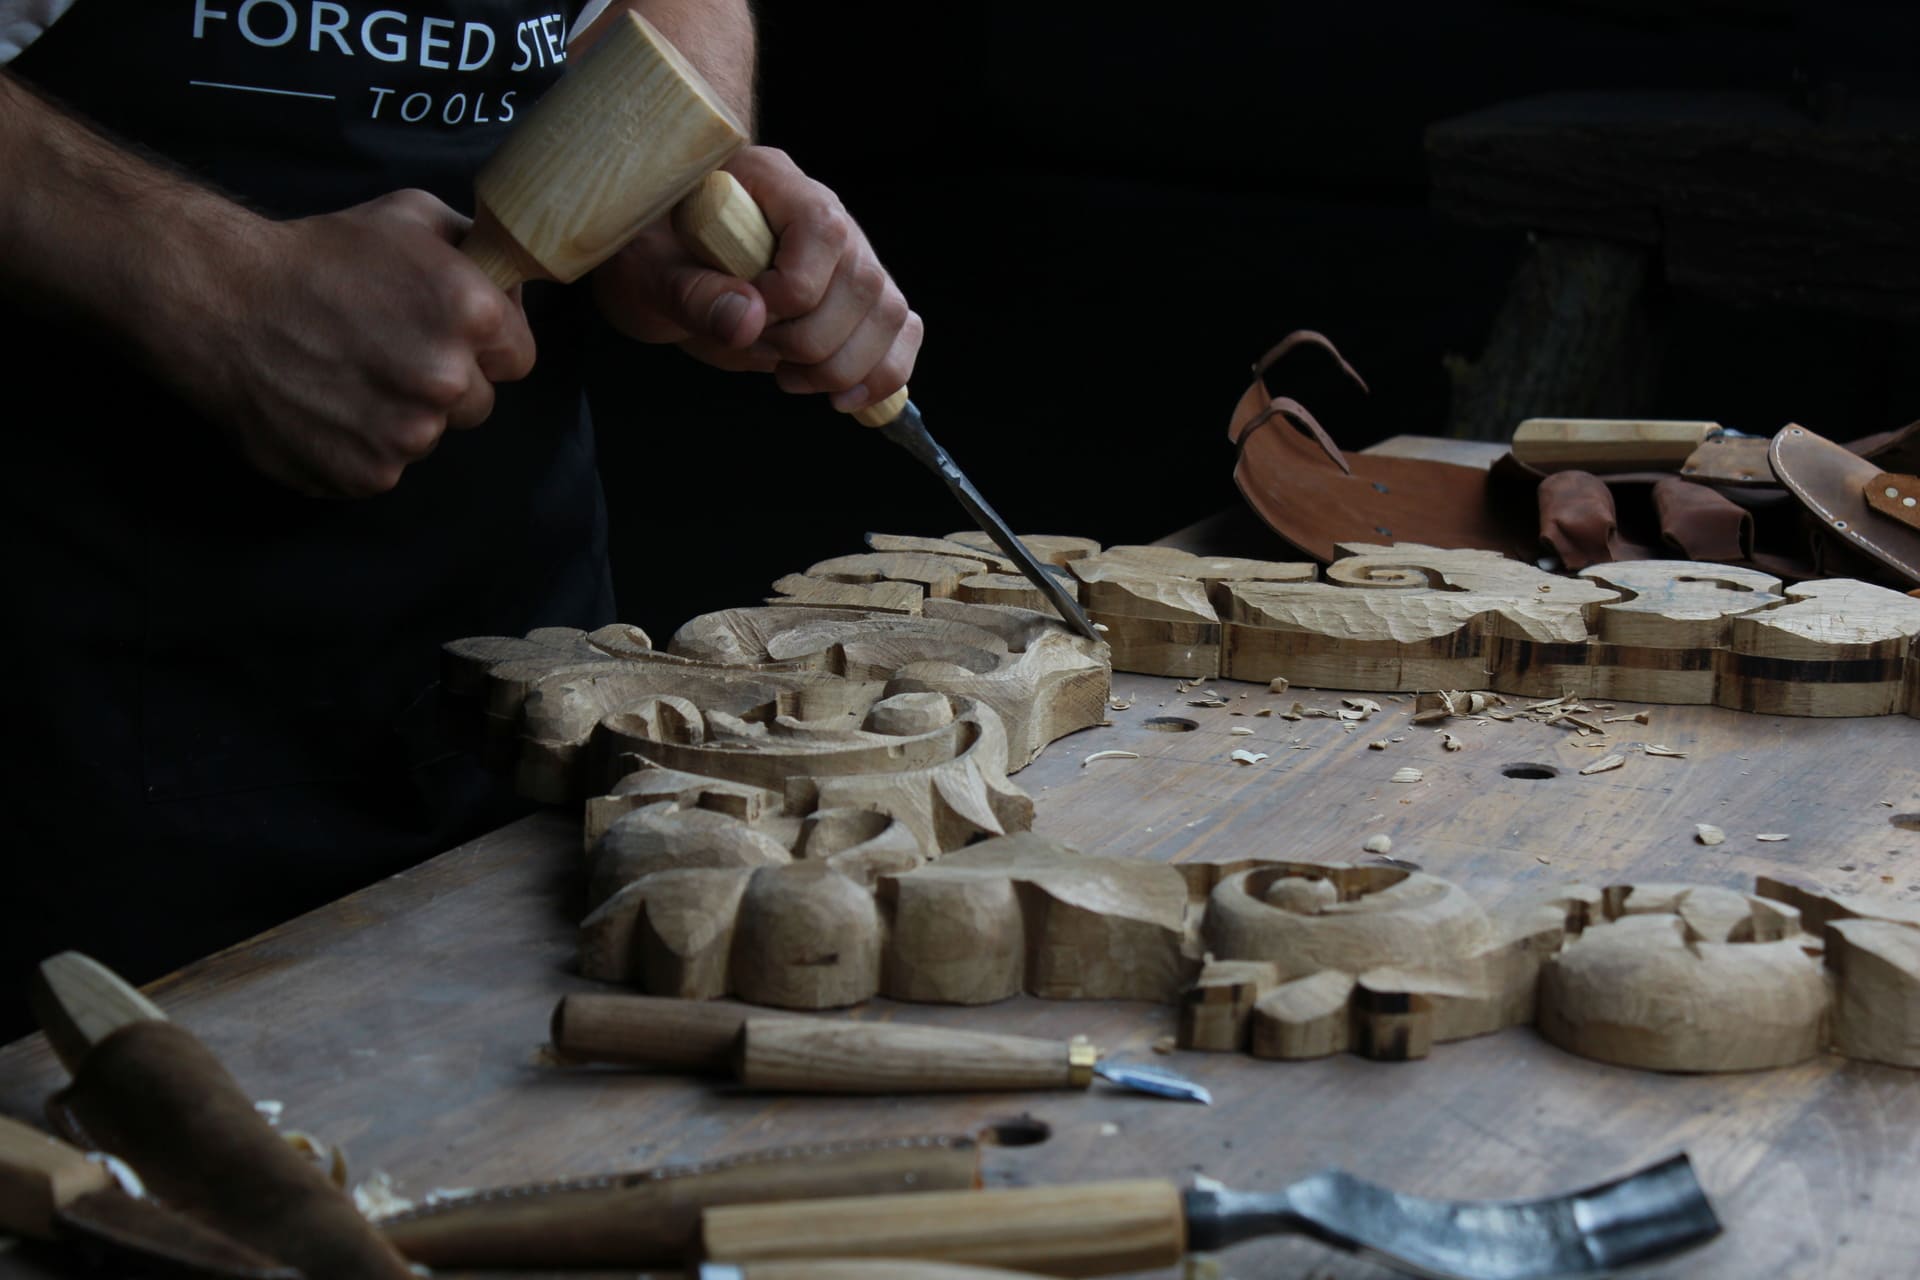
In relief wood carving, selecting the right carving tools can significantly influence the smoothness of the carving process and the final appearance of your project. Below, we recommend a basic set of different tools to support your beginner relief carving needs and allow you to grow your skillset over time.
Carving Knives
Carving knives come in a wide variety of types to suit many applications. For beginners, straight detail knives are an excellent choice, offering versatility for intricate work and precision cutting. Recommended characteristics:
- Blade length - 1.5" (38 mm).
- Blade thickness - 1.5–2 mm.
- Bevel angle - 12–15° for precise relief carving.
- Steel type - high-carbon steel for durability and better edge retention.
A chip carving knife (1" blade, 17–20° bevel) can be of help for geometric patterns and intricate decorative cuts.

Gouges
These wood carving tools are used for removing material efficiently and creating smooth, curved surfaces. Some of the gouge types you may want to add to your relief carving collection:
- Small U-Gouge (for fine details)
- Blade width - 3 mm.
- Sweep - #3 (shallow curve).
- Use - soft detailing, shallow texturing.
- Medium U-Gouge (versatile shaping)
- Blade width: 6–8 mm.
- Sweep - #5–#7.
- Use - general shaping, carving relief layers.
- Deep U-Gouge (for texture and depth)
- Blade width - 2–3 mm.
- Sweep - #11 (deep curve).
- Use - carving deep relief, hair, or fur details.
V-Tools
V-tools are used to carve crisp, narrow lines and define edges.
- 45° V-Gouge (3 mm width) – best for deep line carving and texturing.
- 60° V-Gouge (6 mm width) – ideal for medium-width grooves and outlining reliefs.
- Bevel angle - 20–25°.
- Steel type - high-carbon steel for sharpness and longevity.
Flat Chisels
Flat carving chisels make straight cuts, flatten surfaces, and clean up wood relief edges.
- Skew chisel (20 mm width, 15° bevel) – for smoothing and reaching into corners.
- Straight flat chisel (10–12 mm width, 20° bevel) – best for leveling background areas.

Mallets
Mallets provide the force needed for controlled wood carving without straining your hands.
- Wooden mallet (12–16 oz) – a good choice for relief carving for beginners due to softer impact.
- Rubber mallet (16 oz) – reduces shock and vibration, good for wood relief carving in softwood.
Sharpening Tools
Keeping tools sharp is essential for smooth cuts and safety when carving wood.
- Diamond sharpening stone – 800–1200 grit for sharpening, 3000+ grit for polishing.
- Leather strop with honing compound – for regular edge maintenance.
- Angle guides – help maintain correct bevel angles while sharpening.
Clamps and Non-Slip Mats
- C-Clamps – keep wood firmly in place for better control.
- Non-Slip Mat – an alternative to clamps that prevents wood from shifting.
Best Wood Choices for Relief Carving
Picking the right wood for a wood relief carving project is key, and it's all about finding a good balance. First, think practical: what wood can you easily get your hands on, and what fits your budget? Some woods can be tough on your tools, so choose wisely. Whether you are planning to paint your carving or let the natural wood shine through will also influence your choice.
Understanding wood grain is also very important. Grain often changes direction, so learn to spot it with a quick look and a test cut. Carving "downhill" with the grain is a must, no matter the wood. For intricate details, a fine grain wood is your friend, while milled wood offers a flat surface to start with. Local sawmills might have some unique wood types for carving patterns.
Don't forget the drying process and testing how the wood carves. Try carving the end grain to see how it reacts. While any grain is workable for beginners, getting good at reading and working with it is essential. If you are aiming for simple relief carving, the right wood will make a big difference in achieving a smooth texture in your final piece.
Some of the most widely used wood choice include:
Basswood
Key Characteristics:
- Soft, fine-grained, and even-textured.
- Light, creamy white to pale brown color.
- Low Janka hardness rating.
- Very easy to carve.
Suitability for Relief Carving:
Excellent for beginners and intricate patterns, it takes fine detail well and can fuzz up slightly when sanded. Highly recommended for beginners due to its softness and ease of carving. Ideal for wood relief projects that require fine detailing.
Butternut
Key Characteristics:
- Soft, lightweight, and relatively straight-grained.
- Light brown to grayish-brown color.
- Slightly harder than basswood.
- Easy to carve.
Suitability for Relief Carving:
Butternut is good for intermediate carvers. It has pronounced grain that can make fine details less visible on larger pieces. Suitable for beginners after gaining some experience with basswood. Works well for animal silhouettes due to its ability to hold moderate detail without excessive chipping.

Limewood (Linden)
Key Characteristics:
- Very soft, fine, and even-textured.
- Pale yellow to creamy white color.
- Very low Janka hardness rating.
- Extremely easy to carve.
Suitability for Relief Carving:
Ideal for highly detailed and delicate carvings. Excellent for beginners, very similar to basswood in workability. Works particularly well for bas relief carvings, allowing for smooth transitions between layers.
Walnut and Mahogany
Walnut
Key Characteristics:
- Hard, dense, and close-grained.
- Dark brown color with a rich, warm tone.
- High Janka hardness rating.
- Difficult to carve.
Mahogany
Key Characteristics:
- Medium-hard, even-textured, and moderately dense.
- Reddish-brown color.
- Moderately difficult to carve.
Suitability for Relief Carving:
Walnut: Best wood for experienced carvers. Very detailed carving is possible, but takes a lot of time.
Mahogany: Suitable for experienced carvers. Works well for decorative carved wood pieces with elegant designs.
Cherry and Maple
Cherry
Key Characteristics:
- Medium-hard, close-grained, and smooth.
- Rich reddish-brown color.
- Medium Janka hardness rating.
- Moderately difficult to carve.
Maple
Key Characteristics:
- Hard, dense, and close-grained.
- Light cream to reddish-brown color.
- Medium to high Janka hardness rating.
- Moderately to very difficult to carve.
Suitability for Relief Carving:
Cherry: Good for detailed carvings with a smooth texture. Ages very well. Suitable for beginners with some experience.
Maple: Best for experienced carvers. Hard maple can be very challenging but is excellent for achieving depth texture in relief carvings.
Step-by-Step Relief Carving Techniques
When preparing to bring your relief carving patterns to life, remember to leave extra wood around the design for clamping and to allow for mistakes. Understanding grain direction, as previously discussed, is also crucial. Here is a breakdown of basic and advanced techniques to help you realize your flat wood carving ideas:
Transferring the Design:
- Carbon paper and masking tape: Trace the design over carbon paper for a precise transfer. Use masking tape to prevent unwanted marks.
- Freehand drawing: For simple or custom designs, lightly sketch directly onto the wood using a soft pencil.
- Digital templates: Printed templates can be adhered with spray adhesive or traced using graphite transfer sheets.
Basic Carving Techniques:
- Outlining the design:
- Outline the design with a stop cut, using a sharp knife to create a defined edge that prevents tear-out.
- Deeper stop cuts are useful for low relief effects, while lighter cuts work well for broad outlines.
- Lowering the background:
- Remove excess wood around the design to create depth.
- Consider using:
- Chisels and gouges for better control and a traditional finish.
- Power tools for faster removal (requires careful handling to avoid mistakes).
- A router for setting an even depth in larger carvings.
- Work in small sections to maintain control over depth and avoid gouging too deeply.
- Efficient Background Removal:
- To remove large sections quickly, use a U-gouge or flat chisel.
- Work in layers design rather than cutting too deep at once.
- Smooth the background with a skew chisel or sandpaper for a refined finish.
- Refining Details:
- A V-chisel is perfect for precise line work, creating defined edges, as it cuts both sides of a line simultaneously.
- Lightly sand areas that need a softer transition, while preserving tool marks for texture.

Advanced Techniques:
- Undercutting for depth & shadows:
- Use a small gouge or knife to carve slightly underneath edges, making elements appear more raised.
- This technique enhances contrast in dimensional designs by creating natural shadows.
- Creating realistic textures:
- Wood grain effects: Use a fine V-chisel to simulate wood fibers.
- Stone or fabric effects: Carefully chip or stipple surfaces for natural texture.
- Layering for a 3D effect:
- Carve different layers gradually to create a sense of depth.
- Work from the highest point to the lowest to maintain perspective and proportion.
- Delicate details are best achieved using very sharp tools, and good lighting.
- This is a great technique for beginner easy relief sculpture projects.
Finishing and Preserving Your Relief Carving
To truly elevate your relief wood carving patterns for beginners, consider these refinements that will help you establish a solid foundation for future projects.
Achieving Smoothness:
- Begin with a coarse grit sandpaper, removing the marks of wood carving chisels. Then, move to finer grits, with each pass carefully smoothing out the tiny scratches from the previous grit, until you get a flawless surface.
- Always sand in the same direction as the wood grain to avoid ugly cross-grain scratches that ruin the finish and are hard to fix.
- For small and detailed areas, use small sanding blocks, flexible sanding films, or tightly rolled sandpaper.
Selecting the Ideal Finish:
- Penetrating oils like linseed or tung soak into the wood and enhance its natural colors, showing off the beauty of its grain. Tung oil, in particular, protects well against moisture, enhancing the visual depth of beginner relief carving patterns.
- Waxes like beeswax create a shiny protective layer on the wood. They are easy to apply and buff to a soft shine, but they do not protect much against moisture and wear.
- Strong varnishes, like polyurethane or acrylic, form a clear, protective layer that guards against moisture, scratches, and UV light. They come in various finishes, from matte to glossy, creating a light shadow effect that brings out the depth of relief carving patterns.
Protecting the Wood:
- Sealing the wood is essential to prevent it from warping and dirt. A thorough wood check before sealing is always a good idea.
- Sealants such as shellac provide a reliable moisture barrier. Lacquer dries quickly and is very tough.
Apply sealants in thin, even layers, and let each layer dry completely before adding the next. For detailed carvings, use a brush or spray to cover all areas evenly, including the small and tricky spots, and even for pieces several inches wide. Apply multiple coats for better protection, especially in humid environments.
Share:
Wood Carving Techniques for Beginners
How to Carve Chess Pieces Like a Pro
1 comment
Great article ! All the needed information in one place.
Thanks