Creating your own hand carved chess set is a fantastic wood carving project. It is a journey, and turning plain wood into playable art – beautiful wooden chess pieces – is incredibly satisfying.
It definitely takes skill and patience, but do not let that intimidate you. Just plan time and commit to chess carving regularly, as if you are planning to carve a chess set without a lathe, it may take over 100 hours for all 32 pieces.
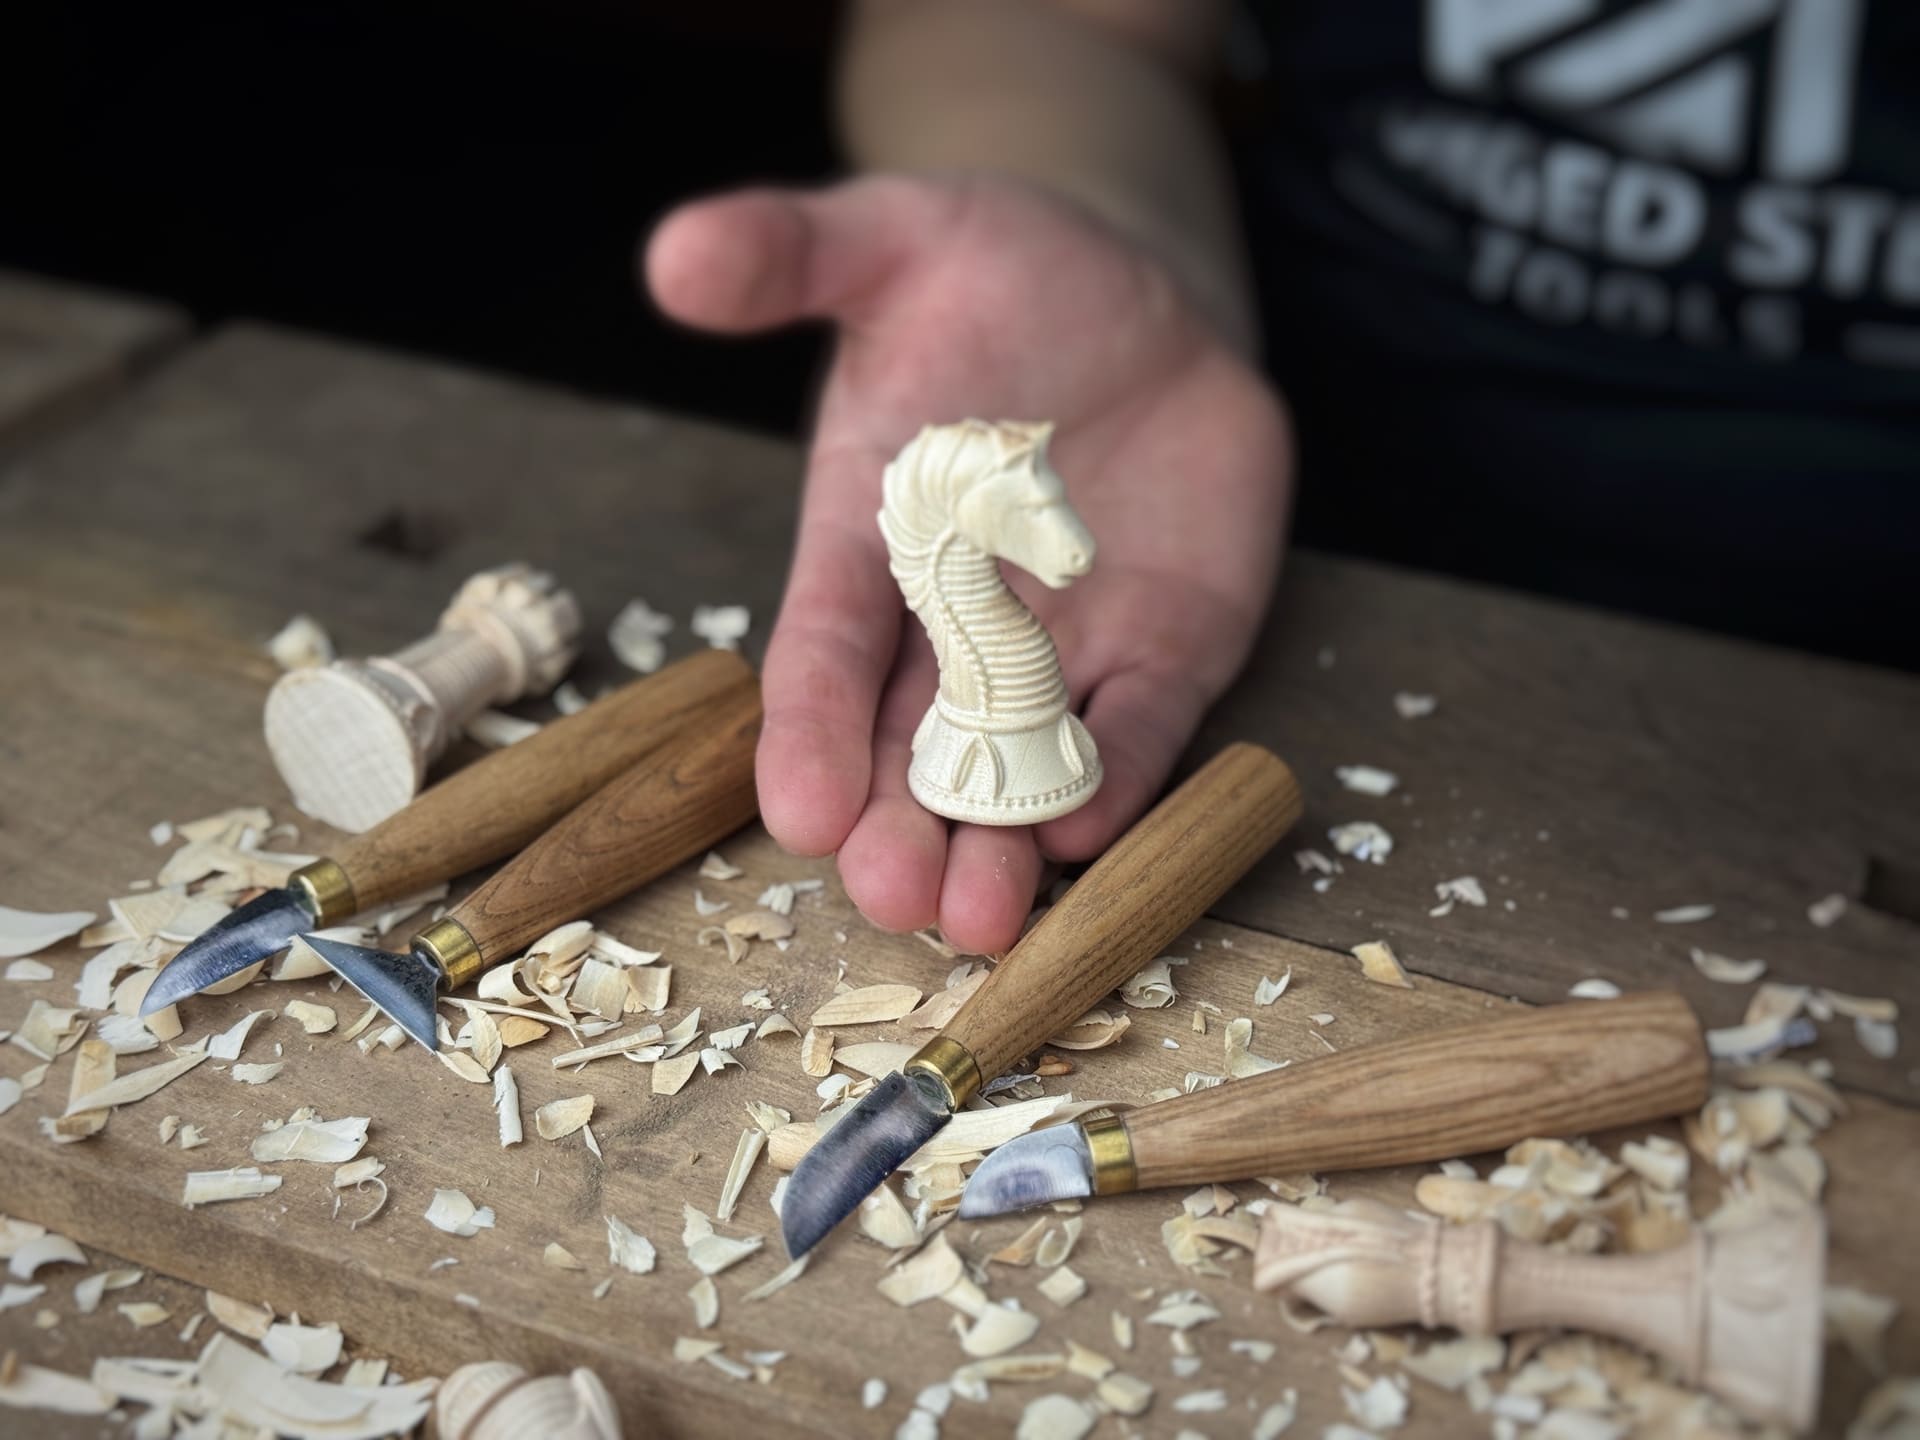
Trying to make everything perfectly round by hand is tough, and those little carved imperfections just add character to your wooden set. This is a great project for anyone that wants to try their hand at working with wood.
Here is some practical advice to get you started on your chess project:
- Begin by designing your pieces. Choose a base size that fits your chessboard squares.
- Keep your designs a bit bigger and avoid super tiny details.
- Start with really simple designs, so you can tell each piece apart.
- As you get more confident, add more details.
- Carve one of each piece first. This lets you see what works and adjust your design as you go.
This post will guide you through all the preparation stages, including choosing the right wood for carving chess pieces, outlining the steps to design each piece, and highlighting common mistakes to avoid. Let's dive in.
Choosing the Right Wood for Chess Piece Carving
When making a chess set, take your time to evaluate wood types you will want to use.
If you are planning a hand carved chess set, basswood is a great choice since it is one of the easiest to carve.
Instead of using different woods for white and black wooden chess pieces, you can stain or paint them because darker woods are usually harder to carve.
Before you start carving, prepare enough wood blocks for all your wood chess pieces, plus 15-20% extra for practice and mistakes. A good chess kit should include spare blocks to ensure consistency in your design.
Now, let’s review some of the best woods for DIY chess pieces:
Basswood – Ideal for Beginners
- Pros: Soft and easy to carve, fine grain, inexpensive, widely available.
- Cons: Lacks durability, may not hold fine details as well as harder woods.
- Skill Level: If you are new to carving chess pieces, this wood is ideal due to its simplicity and forgiving nature.
Boxwood – Traditional Choice for a Wooden Chess Set
- Pros: Dense, smooth grain, excellent for fine detailing, used in professional sets.
- Cons: Harder to carve than basswood, requires sharp tools, can be expensive.
- Skill Level: Better suited for experienced carvers.

Walnut & Mahogany – Premium Woods for a Hand-Carved Chess Set
- Pros: Rich, elegant appearance, durable, strong contrast when polished.
- Cons: Harder to carve, interlocking grain (especially in mahogany) makes detailing tricky, more expensive.
- Skill Level: Best for those comfortable with hard pieces of wood and fine detailing.
Maple & Ebony – Classic Combination for a Luxury Chess Set
- Pros: Durable, high contrast between light (maple) and dark (ebony), smooth grain for precision carving.
- Cons: Ebony is extremely dense and brittle, making it tough on tools; maple is easier but still requires precision.
- Skill Level: Requires patience, sharp tools, and advanced carving techniques.
Essential Tools for Carving Chess Pieces
If you are looking to make your own chess board kit, carving a chess pieces set is a rewarding challenge. For beginners, carving knives and gouges are ideal for shaping wooden chess pieces, ensuring smooth curves and refined edges. Clamps help stabilize the wood, while sharpening tools keep your blades razor-sharp for precise cuts—essential for crafting a high-quality wooden chess set.
As you advance, chisels and rotary tools allow for intricate detailing, perfect for sculpting a chess knight or shaping a chess pawn with high precision. If you are working on a luxury chess set, selecting the right tools will make a significant difference in achieving a polished and professional finish. Whether you are just starting or refining your technique, having the right pieces set will ensure consistent results.
Here’s a closer look at the essential tools:
Carving Knives – Precision for Fine Details
Why you need them:
- Essential to carve chess pieces with refined edges and intricate details.
- Perfect for shaping delicate features like the knight’s mane or the queen’s crown.
- Useful for cleaning up rough edges and refining the final look.
When to use:
- Mostly in the final stages after rough shaping.
- Great for adding finishing touches before sanding and polishing.
Gouges & Chisels – Shaping Curves and Clean Edges
Why you need them:
- Gouges (curved blades) create rounded shapes, ideal for sculpting a wooden chess pawn or the rook’s towers.
- Chisels (flat blades) ensure clean edges and smooth surfaces.
- Useful for both rough shaping and fine detailing, making them essential for any carved chess pieces.
When to use:
- Throughout the carving process, from shaping the initial form to adding details.
- Helps define the precise lines of the king, queen, and rooks.

Rotary Tools & Micro-Carvers – Intricate Detailing Made Easy
Why you need them:
- Tools like Dremels enable detailed carving, smoothing surfaces, and working in tight spaces.
- Micro-carvers (smaller rotary tools) allow for even greater precision.
- Perfect for intricate designs, especially when carving a chess knight.
When to use:
- Mostly in the final stages for intricate work and texturing.
- Can also assist in shaping complex forms earlier in the process.
Clamps & Carving Jigs – Stability for Safety and Accuracy
Why you need them:
- Clamps hold the wood securely in place, preventing movement and ensuring safe carving.
- Carving jigs (custom holders) help position the wood at precise angles.
- Essential for working with rotary tools to avoid slips while crafting wooden chess pieces.
When to use:
- Throughout the entire carving process, from rough shaping to fine detailing.
- Helps maintain control and ensures accuracy, making it easier to complete a detailed piece set.
Sharpening Tools – Keeping Blades Razor-Sharp
Why you need them:
- Sharp tools result in cleaner cuts and require less effort.
- Whetstones, strops, and sharpening systems keep knives, chisels, and gouges in top condition.
- Prevents rough cuts and splintering, crucial for crafting durable and professional wooden chess pieces.
Step-by-Step Guide to Carving Chess Pieces
To help you navigate the carving chess process, here is a breakdown of the key steps involved, especially relevant for those exploring how to make wooden chess pieces without a lathe:
Step 1: Designing and Planning
- Decide whether to create a hand carved chess set in a traditional Staunton style or a more artistic, modern design.
- Do not be afraid to let each piece have its own slight variations; they do not all have to be perfect replicas.
- Sketch or transfer a template onto the wood to ensure accurate shapes for original chess pieces.
- If you are tackling the wooden chess knight, keep a reference image handy.
- If using a chess kit, make sure you have wood blocks cut to the right dimensions for each piece before wood carving chess pieces. For the knight, use 1x1x2 inch blocks.
Step 2: Carving Basic Shapes
- Begin with rough shaping by using a chisel and carving knife to block out the initial shape of the hand carved chess pieces.
- Maintain symmetry by marking guidelines to ensure all tournament chess pieces have consistent height and proportion.
- Taper the neck of the knight into a cone shape.
- For rounded pieces like the chess pawn, use a gouge to shape smooth curves. To create the sharp lines of the rook, use chisels. Round off corners of the wood block to make it more comfortable to hold.
Step 3: Adding Fine Details
How to carve chess pieces with precision:
- Pawn: Round the top with a whittling knife and refine the shape.
- Wooden chess knight: The most challenging piece. Outline the horse’s head with a detail chisel. Start with the side profile, then cut the top of the head and face. Use a V-gouge for the mane’s flowing texture. For the ears, use simple V-cuts. Remember that the knight will have a lot of sanding and refining.
- Bishop: Create the signature slit at the top using a chisel.
- Rook: Carefully carve the castle-like battlements with a detail chisel and ensure even spacing.
- King & Queen: Use a chisel for shaping crowns; carve the king’s cross carefully with a detail knife. The knight may need a lot of free hand carving, and filing, after the basic rough shaping is done.

Step 4: Smoothing and Refining
- Use medium-grit sandpaper (150-220) to remove rough edges, followed by fine-grit (400-600) for a polished look.
- Fine-tune details with micro chisels and precision knives to give each piece a finished, professional appearance.
- Check the balance of each piece, especially for weighted chess pieces, ensuring they stand evenly on the board.
Step 5: Finishing and Polishing
- Decide whether to stain or leave your chess set wooden for a more classic aesthetic.
- Use both a dark walnut stain and a beeswax paste for different finishes.
- Apply wood sealant or beeswax polish to protect your carved chess pieces from wear.
- Buff each piece to a smooth finish, making sure your original chess set is tournament-ready. Angling certain areas of the base will help the stain to adhere. This process allows you to make beautiful homemade chess pieces without the need for a lathe.
Common Mistakes and How to Avoid Them
Before you start, let's review some frequent mistakes made while carving a chess set. Learning from these will help you achieve better results.
Uneven Proportions Between Hand Carved Chess Pieces:
- Why it occurs: Lack of templates, inconsistent measurements, varying wood chess density.
- How to avoid it: Use templates, measure often, mark guidelines, and create reference pieces.
Rough Cuts While Making Chess Pieces:
- Why it occurs: Dull tools, poor technique, rushing, inexperience.
- How to avoid it: Sharpen tools, practice proper technique, use controlled movements, practice on scrap wood, take small cuts.
Wrong Wood for Wood Carved Chess Pieces:
- Why it occurs: Coarse grain, unsuitable hardness, ignoring grain direction, unseasoned wood.
- How to avoid it: Choose fine-grained wood (basswood, walnut), carve with the grain, select quality wood, use seasoned wood. Consider, if creating a weighted set, the density of the wood.
Skipped Sanding/Finishing of Chess Pieces Carved:
- Why it occurs: Impatience, underestimation, lack of knowledge, improper tools.
How to avoid it: Use progressive sanding, sand thoroughly, apply appropriate finishes, buff, allow sufficient time. Consider a set storage solution to protect the wood carved chess set after finishing.
Share:
Mastering Relief Carving: Techniques, Tools, and Best Wood Choices
How to Sharpen a Whittling Knife?