Why Use Carving Templates?
Regardless of your proficiency level, using wood carving patterns can help stay consistent and maintain a high level of wood carving accuracy. This is especially important when you are making multiple identical items, but the benefits go beyond repetition and precision.
Save time on layout and proportion
Transferring shapes onto a piece of wood can be time-consuming—especially with complex forms. That is where wood carving templates come in: they simplify the process, reduce setup time, and keep things tidy.
If you are working on repeated shapes, creating a reference list speeds up carving across similar pieces. And by adding well-planned outlines early on, you ensure cleaner cuts and more efficient carving when it is time to carve wood.
Great for practice, repetition, and symmetry
Repeating shapes is the fastest way to build skill and muscle memory. Practicing with free wood carving patterns improves control, symmetry, and visual rhythm—especially for faces, animals, and ornamental patterns. These templates support proper hand technique and bring proportional awareness to your designs.
Using wood carving patterns for beginners can make a big difference in how quickly you gain confidence. Simple carving patterns for wood focus on essential shapes and help beginner carvers understand grain direction and learn knife control.
Patterns that teach form before freehand carving
Relief wood carving patterns are an easy way to get started on intricate or challenging projects. You can transfer a pattern to the wood, which provides a clear guide for proportions and key details that you can later refine with freehand carving.
For example, 3D wood carving patterns are a powerful tool for learning how to transform a flat 2D design into a fully shaped 3D figurine. These patterns guide you through the process of carving depth, contours, and proportions, helping you visualize how each line on paper translates into volume in wood.
Where to Start — Patterns by Skill Level
Choosing wood carving patterns by skill level ensures that you always know what outcome you are working toward. Whether you are browsing free wood carving patterns online or sketching your own, having a clear progression helps you stay motivated and creative. Below are some categorized carving ideas—from beginner carving ideas to more intricate carving designs.

Beginner-friendly templates (spoons, leaves, mushrooms)
These wood carving templates help develop essential carving techniques like basic shaping, understanding grain direction, and controlled slicing.
Tools you may need:
- Sloyd knife – for rough shaping
- Detail knife – for refining edges
- Hook knife – for scooping (especially spoons)
- Sandpaper – for smoothing
- Pencil or transfer paper – for tracing outlines
Intermediate patterns (animals, faces, birds)
Intermediate templates like animals, faces, and birds guide carvers through depth control, facial symmetry, and texture carving. If you are exploring animal wood carving patterns like cat wood carving patterns or experimenting with bird wood carving patterns, this is the stage where your skills really begin to shine.
Tools you may need:
- Gouges – for shaping curves and contours
- V-tool – for defining lines and textures
- Detail knife – for precision cuts
- Bench vise – for stabilizing work
- Paintbrushes – if adding color or finish
Advanced designs (reliefs, layered figures)
Advanced templates are often designed to teach multi-depth carving and perspective. These patterns push your ability to create layered compositions, undercuts, and high-relief elements.
Tools you may need:
- Chisels – for depth and edge control
- Veiners and bent gouges – for fine detail and curvature
- Mallet – for controlled force in deeper cuts
- Gauge – for consistent relief levels
- Ruler – for layout precision
Free Downloadable Carving Patterns
When it comes to finding fresh wood carving patterns, sources of inspiration are everywhere. From Reddit threads and Facebook groups to curated platforms like the Woodcarving Illustrated Forum—where discussions dive deep into technique and pattern specifics. If you prefer visual guidance, try Charly Brunet Sculpture channel on YouTube, it offers step-by-step tutorials paired with printable carving designs to get you started. Let’s explore some of the most popular templates and where to find them.
Spoon & utensil carving (PDF templates)
Spoon carving is a great entry point for beginners and a meditative practice for seasoned carvers. Using spoon carving templates you focus on shaping and hollowing techniques. These templates are often shared in community forums like Reddit’s r/woodcarving, where users post printable wood carving stencil PDFs and hand-drawn designs.
You can also find simple wood carving patterns free in r/Spooncarving (Reddit), Sawmill Creek – Woodcarvers Forum, Spoon Club, and other similar communities. For visual learners, YouTube channels such as Woodcraft Hamster feature spoon carving tutorials that show how to transfer paper templates and carve efficiently.

If you are just starting out, the Spoon Carving Kit for Beginners includes a pre-shaped blank, essential tools, and a pencil for marking—making it an easy carve project with everything you need to begin.
Animal figures (bears, owls, fish)
Animal carving like free bird carving patterns teaches texture, depth, and expressive shaping. YouTube creators like Linker (@dougLinker) demonstrate techniques using basic tools and often share their own sketches or outlines. These are especially helpful when working with animal wood carving patterns, which require attention to proportion and surface detail.
Alternatively, you may search for websites like AdamPrintables.com that offer lots of animal figurine templates for free.
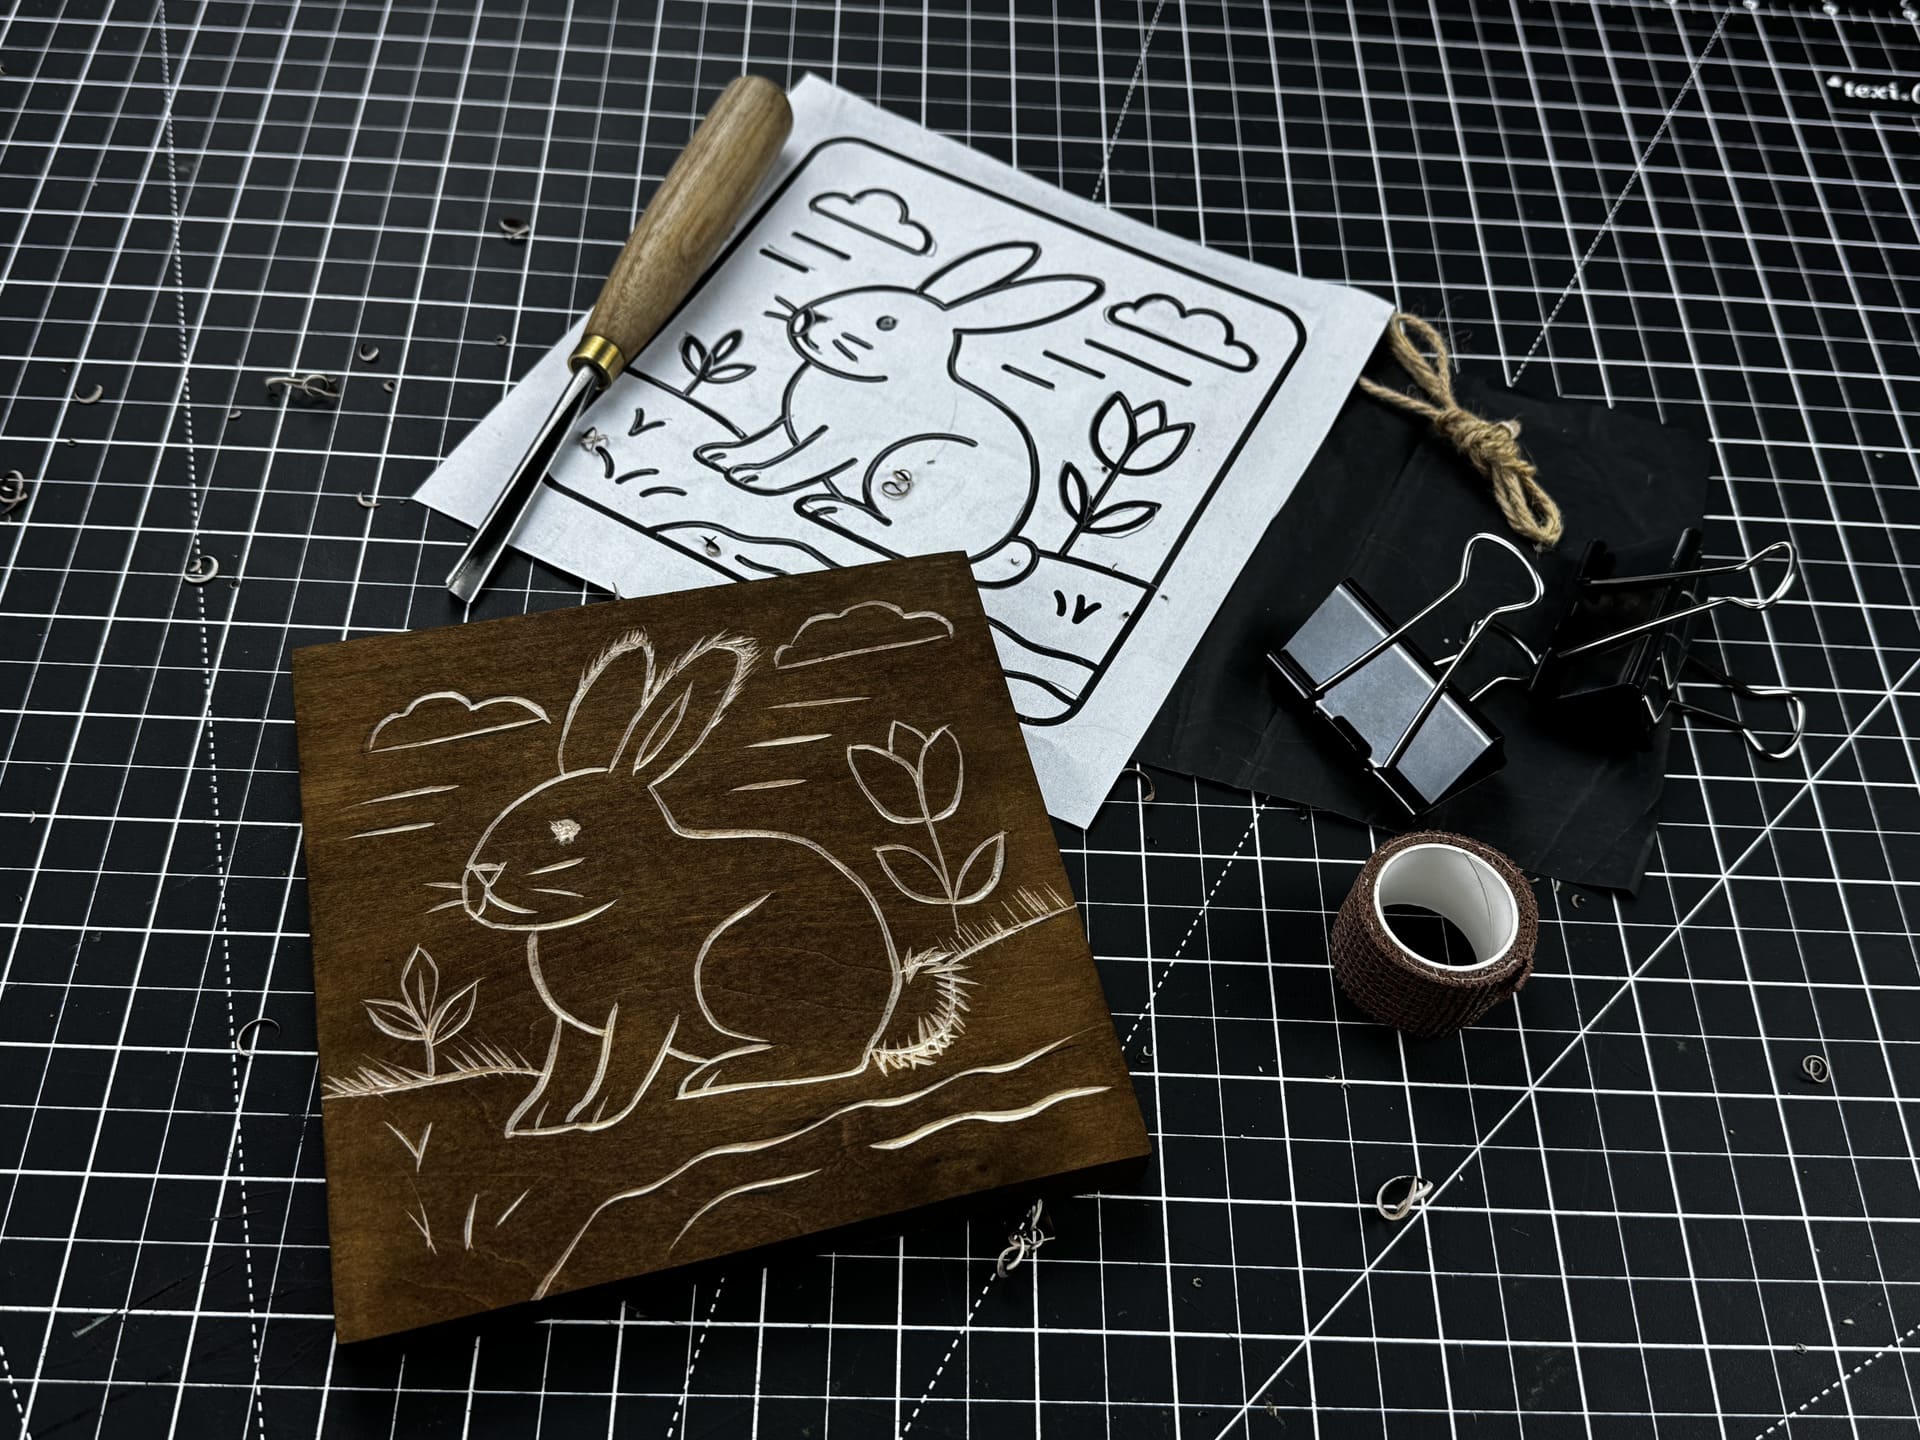
For those looking for a guided experience, the DIY Bunny Kit and Beaver Kit include DIY wood carving outlines. These kits are especially helpful when working with an easy animal carving pattern and learning how to bring it to life.
Geometric and abstract forms
You can find free chip carving patterns in open-source design archives and educational forums. These designs are great for developing precision and symmetry in your carving style.
For technique and inspiration, consider watching channels like Korvin that offer tutorials on geometric layout, knife control, and finishing. These projects are a great way to explore different wood carving types, from chip carving to stylized abstract forms.
Seasonal & gift carving templates (Christmas, Halloween)
Seasonal carving is a joyful way to create handmade gifts and decorations. Free templates for Christmas ornaments, Halloween figures, and gnome wood carving patterns are often shared in Pinterest boards and carving blogs. These designs range from simple outlines to more detailed figures.
You might enjoy tutorials from The Artisan Life, which often feature festive characters like gnomes and wizards using carving patterns free. If you are looking for a seasonal project, the Gnome Carving Kit includes a drawing template and softwood blocks—ideal for beginners and kids.
How to Use Printable Templates
There is no shortage of simple wood carving patterns free online. From delicate figurines to bold wall panels, these designs can be scaled to match the size and style of your carving project. Many carving patterns free for download and print are super clear and easy to transfer—just grab some carbon paper, spray adhesive, or sticky-backed sheets and you are good to go.
Scaling templates for your project
Resizing wood carving patterns up or down might sound easy, but keeping the proportions accurate is key. You can do this manually or digitally, depending on what works best for your project. Scaling advanced or beginner dremel wood carving patterns properly ensures your final piece looks just right.
Manual Grid Method
This classic pencil-and-paper technique is great for hands-on carvers. Here is how it works:
- Draw a Grid: Start by drawing evenly spaced squares over your original wood carving patterns.
- Create a Scaled Grid: On a new sheet, draw the same number of squares, but adjust their size to match your desired scale.
- Transfer the Design: Copy the pattern square by square onto the new grid. This keeps everything in proportion.
Helpful Tips:
- Use metric units (centimeters or millimeters) to make scaling calculations easier.
- Place tracing paper over your original illustrated design to protect it while drawing the grid.

Digital Method
This method is fast, precise, and ideal for larger designs or patterns found online.
- Start with a Digital File: Use a scanned image or a downloadable file (.pdf, .jpeg, or vector). Vector files are the best because they scale without losing quality.
- Resize with Software: Open the file in an image editor like Photoshop. Adjust the canvas size to match your wood dimensions.
- Print to Scale: Use a PDF reader with a “Poster” or “Tile” print option. It splits the design across multiple pages, which you can tape together to form a full-size template.
Helpful Tips:
- Try tools like Rapid Resizer, which are designed specifically for scaling and printing patterns.
- If you are working with a wood block carving template, digital resizing can help you match the template perfectly to your block size.
- Some carvers prefer using pattern wood—pre-cut wood blocks with printed designs—as a starting point.
Transferring to wood (carbon, tracing, or spray glue)
Once you have found a set of complex or simple wood carving patterns free for download, the next step is transferring the patterns—and the carbon paper method is a good one to try. However, it is not the only option available. Let’s take a closer look at the most popular ones.
- Carbon Paper
Place the carbon paper (carbon side down) on the wood, then position your printed design on top. Trace the design with a pencil, and the carbon will transfer the lines onto the wood. It is fast and easy to use, though aligning the design precisely can be a bit challenging.
Can be rated 9/10 for its efficiency and simplicity.
- Paper and Tape
Tape the printed design directly onto the wood using packaging tape. It works best with a router, as tools like a Dremel may struggle to cut through both paper and wood. It’s the fastest and most affordable option, especially when adding simple designs.
Can be rated 7/10, especially useful for routing projects.
- Spray Adhesive
Spray adhesive is applied to the back of the printed design, which is then stuck onto the wood. The paper remains in place during carving. However, removing the paper and glue afterward requires sanding, and may force deeper carving.
Can be rated 5/10 due to the extra cleanup involved.

Common mistakes when using patterns
And in summary, just remember that even simple carving designs for beginners can go off track if you are not careful. Here are key pitfalls to avoid when working with wood carving templates:
- Scaling Errors: Distorted proportions from improper resizing can spoil your entire piece. Keep them true to the original.
- Transfer Issues: If your template shifts or lines are too faint or too deep, carving becomes guesswork. Use carbon paper for clean transfers and secure everything carefully before tracing.
Carving Missteps: Carving against the grain or past the lines can damage a project. Make sure to carve with the grain for better results. Start with simpler projects to build skill and confidence before tackling complex designs.
Share:
How to Sharpen an Axe, Hatchet or Maul
What Is Relief Carving? Patterns, Best Tools, Woods & Styles