Understanding Relief Carving
If you have ever asked yourself, what is a relief carving and how it can make your projects stand out, you are in the right place. In this blog, we will explore the key features of this wood carving technique, look at which types of wood and tools work best, and share prep tips to help you get the results you are aiming for. So, if you are new to relief carving or looking to refine your skills, there is something here for you.
What Is a Relief Carving?
So, what is relief carving all about? In simple terms, relief carving is a technique where you make a design stand out by carving away the background of a flat wood surface. As you remove the wood, you create depth, which gives the raised areas a more dynamic, lifelike appearance. Once the background is cleared, you can shape and refine the subject, making the pattern feel almost “alive.”
This wood carving method is often compared to sculpture, but instead of carving all around a figure, you are working from one side—using depth and detail to bring the image forward.
Key Features of Relief Carving
Relief carving focuses on creating sculptural, layered designs. Unlike chip carving, which uses shallow, geometric cuts, or whittling, which shapes small figures with a knife, wood relief carving involves working on a flat surface to create scenes that appear raised. The depth of these carvings can vary greatly, from very shallow designs to deep, high-relief work.
Key Features of Wood Relief Carving
- Viewed from one angle: Since a relief is carved into a flat panel, the design is meant to be viewed from the front side. Varying depths create a sense of perspective and make the piece feel three-dimensional. This technique is commonly used for a wide range of projects, including landscapes, portraits, and decorative elements for furniture.
- Background is carved away: The dramatic effect of carving wood in this style comes from carving away the background.
- Wide range of tools: To achieve different shapes and textures, a variety of relief carving tools are used including gouges, chisels, and V-tools.
- Planning is essential: Having a precise pattern in place helps guide your cuts and ensures the final piece looks balanced and intentional.
- Layered design: In relief carving, elements are arranged in foreground, midground, and background layers, which adds depth and makes the scene more dynamic.

Low Relief vs High Relief vs 3D Relief Carving
Relief carving for beginners often starts with simple tools like chisels and gouges, though more advanced carvers may use CNC routers for more detailed projects. The main difference between styles lies in how much the design stands out from the background.
In low relief carving, the design is only slightly raised, creating a subtle effect similar to a shaded drawing. This style is ideal for decorative panels or coins, where fine detail and minimal depth are key. Artists use clever shaping to suggest form without cutting deeply into the wood—this is known as low relief.
More dramatic results come from high relief carving, where parts of the design rise far from the background. This technique adds bold shadows and a sculptural feel. It is often used to decorate figures and in some sophisticated architectural elements.
Taking it even further, 3D relief carving creates highly realistic, dimensional forms on a flat surface. Carvers shape the sides of the object as carefully as the front, achieving a look that nearly resembles a full sculpture. This style is often considered a form of deep relief, due to the intense carving depth and detail involved.
Choosing the Best Wood for Relief Carving
When starting a relief carving project, one of the first decisions you will make is choosing the right wood. The choice depends on what you are carving, how detailed it needs to be, and whether the final piece is decorative, functional, or meant for outdoor use.
Softwoods vs Hardwoods
Once the project is defined, the next question is which type of wood for relief carving is best—softwood or hardwood.
Hardwoods: Hardwoods like walnut, oak, or mahogany are strong and long-lasting. They often feature beautiful grain patterns that can add character to your carving. However, dense hardwoodі, such as ebony, can be tough on tools and more difficult to shape. These are better suited for experienced carvers working on detailed or high-end pieces.
Softwoods: Softwoods such as basswood, pine, or cedar are much easier to carve and are often recommended for simple relief carving, especially if you are just starting out. They usually do not hold detail well, so this is something to be kept in mind when making a choice. Softwoods are more affordable and better suited for indoor decorative work.
Best Wood for Relief Carving
There is no secret trick—basswood is often seen as the best wood for relief carving, especially if you are in the beginning of your carving journey. It is soft to work with and grabs fine details without breaking apart, even though it is technically a hardwood.
If you are looking for another easy option, eastern white pine is a great softwood that is beginner-friendly and works well for low relief carving.

As you build up your skills, you might want to move on to harder woods. Cherry stands out for its smooth finish and sharp detail, and can be used for more advanced wooden relief carving. Mahogany also gets a lot of love for its strength and beauty, especially when you are working on deeper carving relief projects. These hardwoods take more effort to carve, but they pay off with long-lasting, professional-looking results.
Wood Tips for Beginners
In beginner relief carving, the golden rule is to choose a softwood that will not push back while you are learning. This makes the carving process smoother and helps you build confidence with tools.
- Avoid woods with lots of knots—they can chip or split unexpectedly and make carving more difficult.
- Always go for dry wood instead of green wood. Green wood tends to warp and crack as it dries, which can ruin your final result. Kiln-dried wood with stable moisture levels is a safer and more reliable choice.
- If you plan to add color to your wood relief carving, think about how the wood will take paint or stain. Some softwoods absorb finishes better than others, so it is a good idea to test a small area first.
- To get started, look for beginner relief carving patterns. These can guide your cuts and help you understand how to build depth and texture step by step.
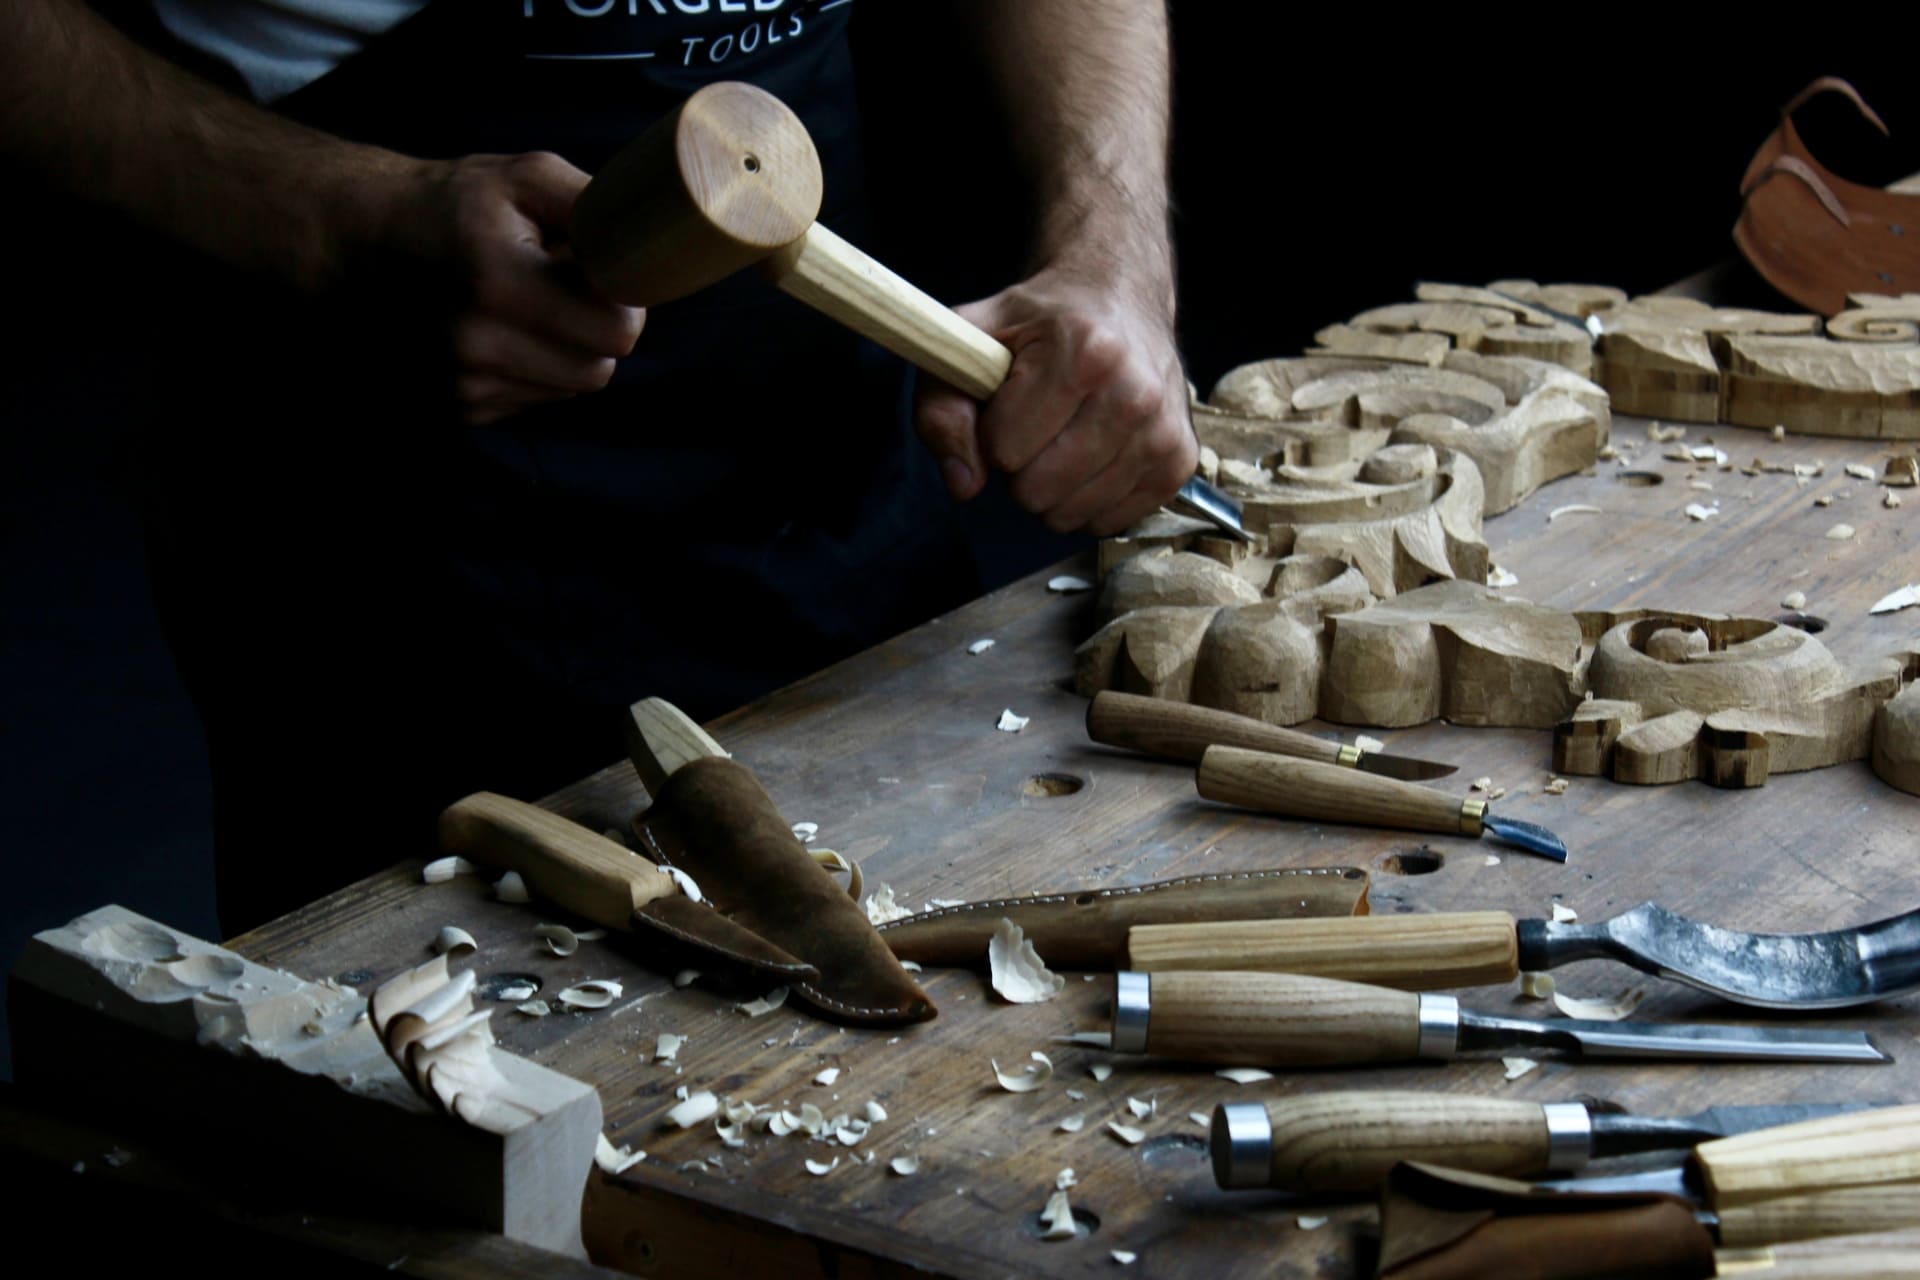
Relief Carving Tools You’ll Need
The quality and sharpness of your carving tools can make or break your relief wood carving experience. So, it is always a smart idea to purchase tools that come sharp right out of the box—you can start carving immediately and know exactly what the correct bevel is, which is especially useful when time comes to sharpen the tool.
Must-Have Relief Carving Tools
When selecting your relief carving tools, we recommend gouges over straight chisels, which are often too rigid for the flowing contours and layered textures typical of relief carving. Here is a curated list of must-have carving tools:
-
Gouges:
- #3 sweep – shallow shaping and smoothing,
- #5 sweep – versatile for background removal and general shaping,
- #7 sweep – deeper contours and curved surfaces,
- #11 sweep – tight curves and intricate detailing.
- V-tools: Ideal for outlining shapes, adding texture, and defining edges.
- Carving knives: For stop cuts, fine lines, and detail work.
- Sharpening tools:
-
- Leather strop with compound.
- Honing stones or sharpening systems.
- Optional advanced tools:
- Dremel rotary tool: for fine detailing and smoothing hard-to-reach areas.
- Burnishing tools: for compressing fibers and polishing surfaces.

Beginner Relief Carving Setup
As a beginner, you do not need a full workshop to take on your first project. A small, well-selected set of relief carving tools can take you far. Many beginners find great starter kits on eBay or through specialized online carving shops. Look for tools designed for softwoods like basswood, which are easier to carve and more forgiving:
- Gouges
-
- #5 and #7 sweeps for basic shaping and background work.
- V-tool
-
- For outlining and simple textures.
- Carving knives
-
- A detail knife or chip carving knife for precision cuts.
- Strop with compound
-
- Essential for keeping blades sharp and safe.
- Basswood blocks
- Soft, consistent wood for practicing relief techniques.
Safety Essentials
Safety should always be a priority—everything from a clean, well-lit workspace to a sturdy workbench and non-slip mat matters when working on any wood carving relief project, as these help you focus on your craft in a comfortable and secure environment.
- Bench Hook: A simple wooden jig that hooks onto the edge of your workbench. It provides a backstop for your carving board or relief carving wood piece.
- Non-Slip Mat: Often made of rubber, it grips both the bench and the wood. Ideal for quick setups.
- Clamps: Versatile and strong—great for holding irregular shapes or larger boards.
- Carving Board: Absorbs pressure and protects your bench. Some have built-in clamps or grooves.
- Cut-Resistant Gloves: Worn on the non-dominant hand (the one holding the wood). They reduce the risk of cuts.
Relief Carving Patterns and Ideas
There are plenty of great places to find relief carving patterns, and many of them offer more than just designs—they connect you with a community of carvers who are eager to share advice and lessons learned. Let’s explore some of those.
Where to Find Relief Carving Patterns
Reddit threads like r/Woodcarving and r/Woodworking are full of useful insights, while the Woodcarving Illustrated forum is a trusted space to connect with experienced carvers. You can also browse free designs on Craftsmanspace. For visual inspiration, try searching for line drawings on Google or Pinterest. If you find an image you like, you can use free software like GIMP to trace the outline, add your own details, and turn it into a custom pattern for your next relief wood carving project.
Beginner-Friendly Designs
When diving into relief wood carving, one of the best ways to build confidence is to start with simple designs and keep your tools sharp and ready. Each of these relief wood carving patterns offers a different kind of practice:
- Leaf Pattern: Helps develop control over curves and depth transitions. It teaches you how to layer and shape organic forms.
- Feather Design: Teaches texture carving and fine line work by practicing shallow cuts and directional flow.
- Tree Silhouette: Builds confidence in outlining and background removal.
- Mountain Scene: Introduces layering and perspective. Good for practicing depth and carving in stages.
- Animal Outline (e.g., bird or fish): Sharpens your ability to follow contours and add small details. Encourages precision and patience.
For visual guidance and hands-on instruction, check out Doug Linker on YouTube. He is highly recommended for his calm, clear teaching style and beginner-friendly tutorials.
Simple Relief Carving Projects
Starting with bas relief (also known as low relief carving) is a smart way to build foundational skills. It allows you to focus on tool control, clean lines, and shaping without the pressure of removing large amounts of material. You may try anything from a stylized leaf to a Celtic knot—they help you explore depth, shadow, and layering while keeping things manageable.

Relief Carving Tips for Beginners
Whenever you decide to take on a relief carving project, some preparation is needed to help you achieve the desired results.
Planning Your First Carving
Select a soft wood like basswood or butternut, which is forgiving and ideal for beginners. Make sure your relief carving tools are sharp and include a few basic gouges, a V-tool, and a detail knife. Match your relief carving wood project to your skill level and available tools.
Sketching & Transferring a Pattern
You can sketch freehand or transfer a printed pattern using carbon paper:
- Choose a clear, bold pattern.
- Tape the pattern to the wood piece.
- Place carbon paper underneath the pattern.
- Trace the design with a pencil using even pressure.
- Remove the paper–check if the lines are clean.
Carving & Finishing Techniques
The basic carving and finishing steps would look like these:
- Start by outlining your design with a V-tool or detail knife.
- Use gouges to gradually remove the background.
- Carve with the grain to avoid tear-out.
- When the carving is complete, smooth the surface with fine sandpaper or a burnishing tool. Finish with a light coat of oil or wax to protect the wood.
Common Mistakes to Avoid
And a few things to keep in mind to avoid most common pitfalls:
- Using dull tools: Leads to rough cuts and poor control—keep your blades sharp with regular stropping.
- Carving too deep too fast: Can damage your design—remove material gradually and build depth in stages.
- Ignoring the grain direction: Causes splintering—make sure to carve with the grain.
Share:
Free Wood Carving Patterns You’ll Actually Want to Use
How to Choose and Dry Wood for Green Wood Carving