


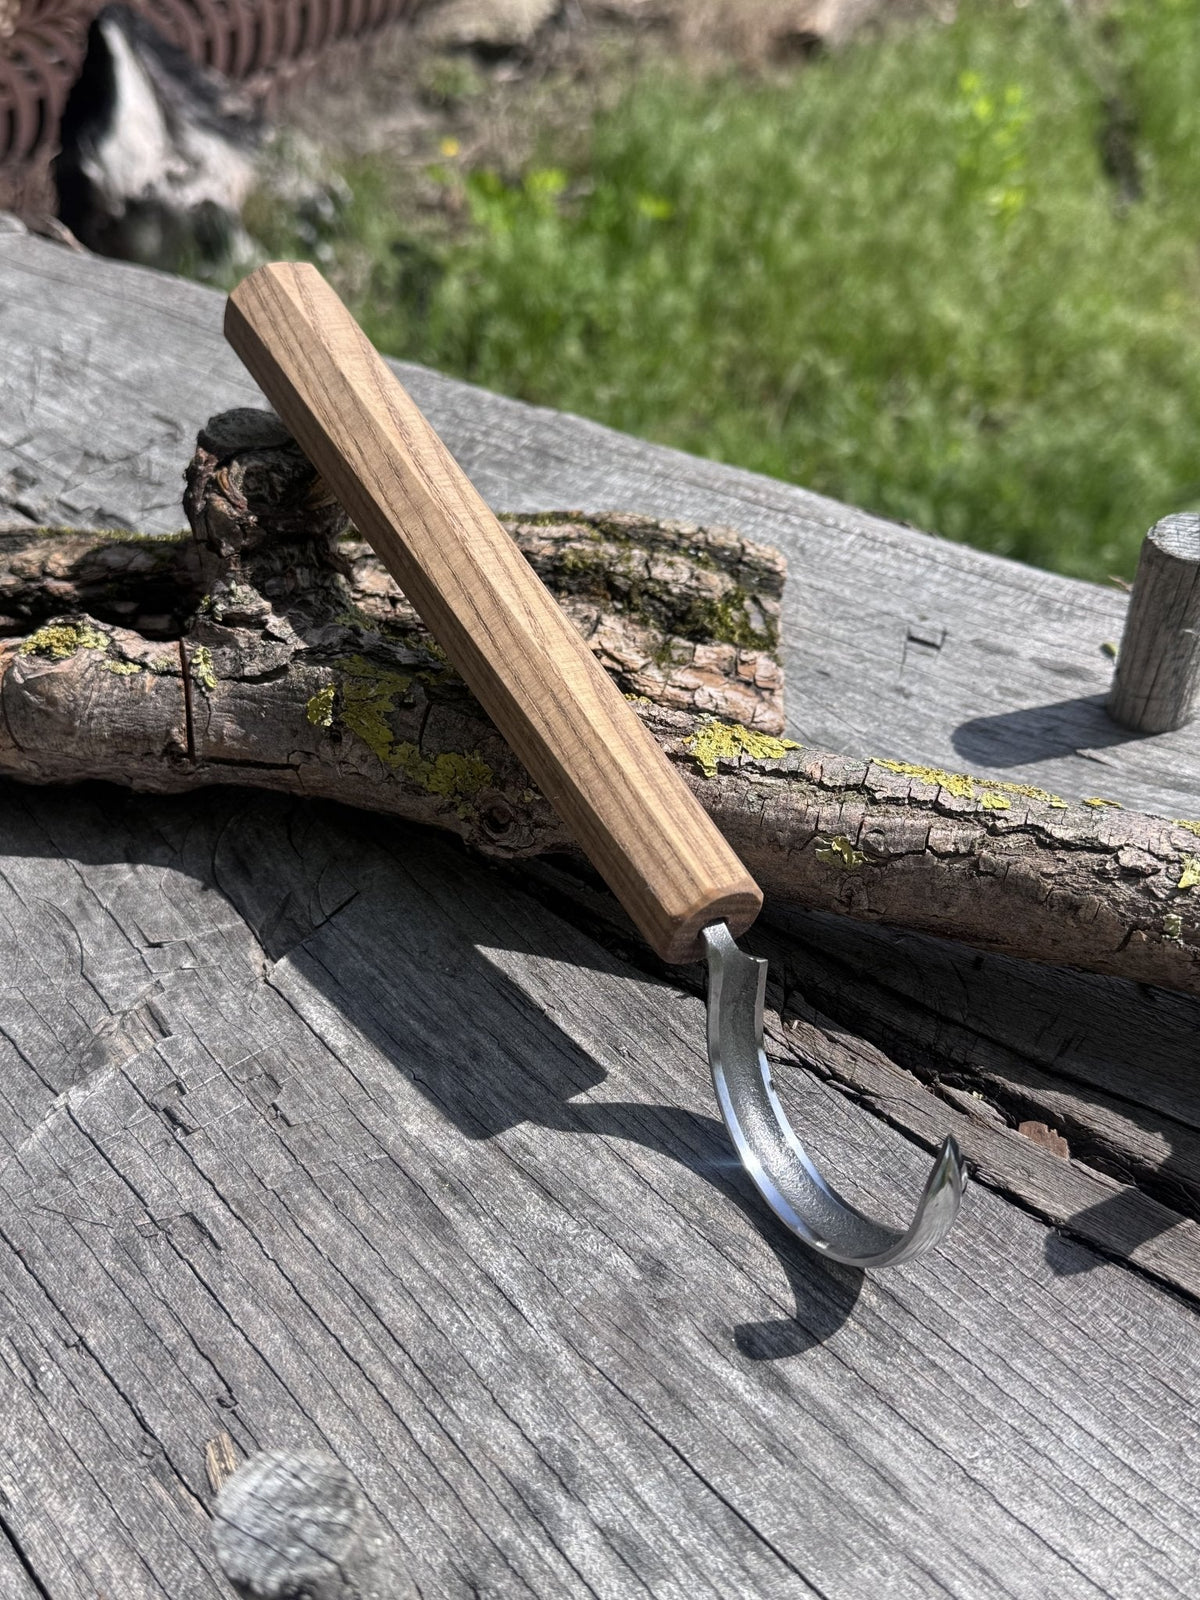
What Is a Hook Knife?
What is a hook knife? It is a curved hand tool that shapes hollow surfaces in wood. While a standard carving knife works well for flat cuts and convex shapes, a hook knife carves spoon bowls and other concave details.
Hook knife vs straight carving knife: what's the difference
A straight carving knife, often called a sloyd knife, shapes handles, convex curves, and outer surfaces. A curved hook knife hollows spoon bowls and removes wood from the inside of a workpiece. The difference lies in the blade geometry: a straight edge wedges into the fibers when pushed into a hollow. On the other hand, a hook carving knife follows the curve and slices cleanly through the grain.
Other names for a hook knife
In hook knife wood carving, this tool goes by several names. In North America, many carvers call it a crooked knife, while in Europe it is often known as a crook knife or scoop knife. Whatever the name, a hook knife for spoon carving is made for helping carvers shape spoons, bowls, etc. with control and precision.
What Is a Hook Knife Used For?
In green wood carving, a hook knife helps hollow wood into functional and decorative shapes
Spoon and ladle carving
The most common use of a spoon carving knife is hollowing spoon bowls and ladles. Carvers use a rotating wrist motion to scoop out thin shavings, selecting different blade sweeps to match the depth of the cut. A tight radius reaches deep ladles more easily, while an open scoop knife sweep leaves shallow spoons with a smooth, even surface.
Bowl carving and hollowing
A hook knife removes waste quickly during bowl carving. Carvers use it when hollowing wood for small bowls, salt cellars, and cups. Clean results depend on reading the grain direction and cutting from the rim toward the center. For larger projects, long-handled carving tools such as the "twca cam" give the user additional leverage.
Other uses: cups, kuksa, and curved details
Many carvers also use hook knives for kuksa carving. The curved blade slices through tough end grain, allowing the inside of a wooden cup to be hollowed without splitting the walls. A hook knife also reaches tight corners, refines rims, and carves decorative concave reliefs that are difficult to produce with a straight blade.

How to Use a Hook Knife: Basic Technique
Learning how to use a hook knife comes down to three things in wood carving: keeping control of the blade, following the wood grain to avoid rough tear-out, and working step by step to carve a smooth, clean concave shape.
How to hold a hook knife safely
The key to carving safety is controlling leverage and keeping the blade away from the other hand.
- Thumb push grip: Rest your thumb on the back of the hook knife blade and push with it. This gives you control without pulling the knife toward your hand.
- Chest lever grip: Tuck your elbows against your body and use your chest to guide the hook knife. This keeps the blade far from your off-hand.
- Power pull: Keep your wrist straight and make the pull stroke from your elbow or shoulder. This keeps the cutting path clear.
- Extra protection: A cut-resistant glove on the hand holding the blank adds safety when practicing hook knife carving.
Working with the grain when using a hook knife
To get clean cuts when you are learning how to use a hook knife, you need to slice with the grain instead of forcing against it.
- Downhill rule: Always cut from the rim down toward the deepest part of the bowl. Cutting “downhill” severs fibers cleanly.
- Waste removal: Start with cross-grain cuts to clear bulk material quickly.
- Finishing cuts: Switch to light, sweeping strokes using a hook knife technique to leave a smooth surface.
Hollowing a spoon bowl with a hook knife
Carving a spoon bowl with a spoon carving knife works best if you follow three simple stages:
Step 1. Roughing out: Use short, firm cuts across the bowl with hooked carving knives to remove most of the waste.
Step 2. Shaping: Slice with a slight rotation of the blade to smooth transitions between rim, sides, and bottom when using a hook knife for carving.
Step 3. Finishing: Make light, sweeping strokes from rim to center with a controlled push stroke to remove ridges and leave a clean, polished hollow.
For a step-by-step breakdown, take a look at “How to Carve a Wooden Bowl by Hand: Techniques and Tools.”

How to Sharpen a Hook Knife
Knowing how to sharpen a hook knife is equally important. The good news is that you do not need expensive sharpening systems or specialized equipment. Your goal is to maintain the original bevel and edge geometry. Like every other aspect of hook knife wood carving, success comes from using the correct angle and letting your abrasives do the work.
Tools you need to sharpen a hook knife
Because a hook carving knife has a concave inside edge and a convex outside bevel, flat sharpening stones cannot properly reach the inside of the blade. As you build your collection of wood carving tools for beginners, it is worth investing in a few simple sharpening supplies designed for curved edges.
- Wooden dowels or shaped hardwood sticks (essential): Use hardwood dowels in several diameters (typically 1/2 to 3/4 inch) or carve a wooden paddle that closely matches the inside radius of your knife.
- Wet-or-dry sandpaper (400-2500 grit): Wrap automotive-grade (wet-or-dry silicon carbide sandpaper) sandpaper tightly around the dowel. This setup follows the blade's curve naturally and is less likely to damage the edge than rigid sharpening tools.
- A leather strop and stropping compound: Use a leather-wrapped dowel for the inside of the blade and a flat leather strop for the outside bevel. Load both with a quality honing compound, such as green chromium oxide.
- A black permanent marker to see whether you are sharpening at the correct angle.
- A small hardwood block for testing the finished edge on end grain.
Tip: Tapered diamond rods and ceramic sharpening slips are excellent tools once you have developed good technique. A sandpaper-covered dowel gives you much better control while you are learning and helps keep your knife in good condition before storing it in its hook knife sheath.
How to sharpen a hook knife step by step
Most commercial wood carving hook knife designs have a single bevel on the outside and a flat inside face. When you sharpen a hook knife, nearly all of the sharpening should happen on the outside bevel. The inside face only needs light polishing to remove the burr.

Step 1: Use the sharpie trick
Color both the outside bevel and the inside face of a wood carving hook knife with a black permanent marker. If ink remains near the cutting edge, your sharpening angle is too shallow. If only the very edge loses its color, you are holding the blade too steeply.
Step 2: Sharpen the outside bevel
- Support the hook knife comfortably on a bench block or hold it securely in your hand.
- Lay your abrasive surface flat against the outside bevel.
- Sweep the blade from heel to tip while rolling it smoothly to ensure you have constant contact with the entire cutting edge.
- Progress through increasingly finer grits (for example, 400 → 800 → 1200) until you can feel a consistent burr along the entire inside edge. This is the core of good hook knife carving.
Step 3: Remove the burr from the inside
- Wrap 1200-grit (or finer) sandpaper tightly around a wooden dowel that closely matches the knife's inside curve.
- Keep the dowel flat against the inside face.
- Gently push or rotate it along the blade to remove the burr. Tilting the dowel rounds over the edge, so your hook knife for spoon carving will not cut as cleanly or as easily.
Step 4: Polish the edge
- Finish with a dedicated hook knife strop or a leather-covered dowel for the inside curve and a flat leather strop for the outside bevel.
- Apply a small amount of honing compound to both stropping surfaces, then make 10 to 15 smooth, edge-trailing strokes on each side.
- Continue until the marker is completely gone and the edge develops a mirror-like polish.
Step 5: Test the edge
- This trick will come in handy for anyone learning how to sharpen a hook knife. You simply need to make a cut across the end grain of a soft hardwood such as cherry or basswood.
- A properly sharpened hook knife should leave a smooth, glossy surface with no white streaks or torn fibers.
Choosing a Hook Knife: What to Look For
The right hook knife should have a blade curve that matches the depth of your project. Another important factor in hand tool woodworking is an ergonomic handle. Let us take a closer look.
Blade radius and size: matching the knife to the project
It is clear that the sweep defines how tightly and accurately the blade curves.
- Small sweep (1/2 to 3/4 inches): A small hook knife is best for carving small eating spoons, coffee scoops, and tight corner details. A tight curve reaches deep into narrow hollows.
- Large sweep (1 to 1.5+ inches): Best suited for shallow bowls, ladles, and wide serving spoons.
- Compound sweep: Features a flatter curve near the handle that tightens toward the tip, offering a versatile mix of broad cuts and detail work in a single blade.

If you are looking for a reliable hook knife for spoon carving for beginner projects, consider these options:
- Morakniv wood carving hook knife: An affordable and widely available choice with a tight curve and a sturdy birch handle. Opt for the newer single-edge version with a blade cover.
- Wood tools open hook knife: Designed by master carver Robin Wood, this budget-friendly option has an open curve that is exceptionally forgiving for beginner spoon carving.
Handle design and comfort for extended carving
Carving with a hook knife can put unique torque on your wrist and hand. An ergonomic hook knife for carving can reduce strain and create better leverage while keeping your grip relaxed:
- Oval or octagonal shape: Avoid perfectly round handles, as they slip and twist in sweaty hands. An oval or faceted cross-section gives your palm natural tactile feedback so you always know where the edge is facing.
- Length for leverage: A slightly longer handle (7 to 9 inches) allows you to tuck the end against your hip or forearm and use larger body muscles rather than just hand strength to make heavy cuts.
- Simple, smooth finish: Steer clear of handles with rigid finger grooves. Spoon carving requires switching between thumb-pushes, pull-cuts, and hook rotations, so a smooth, un-contoured wooden handle lets your hand shift positions easily.
Share:
How to Get Into Wood Carving: Tools, Wood, Techniques & Beginner Tips
What Is an Adze and Should You Add One to Your Carving Kit?