


How to Start Wood Carving Without Buying Too Much Gear
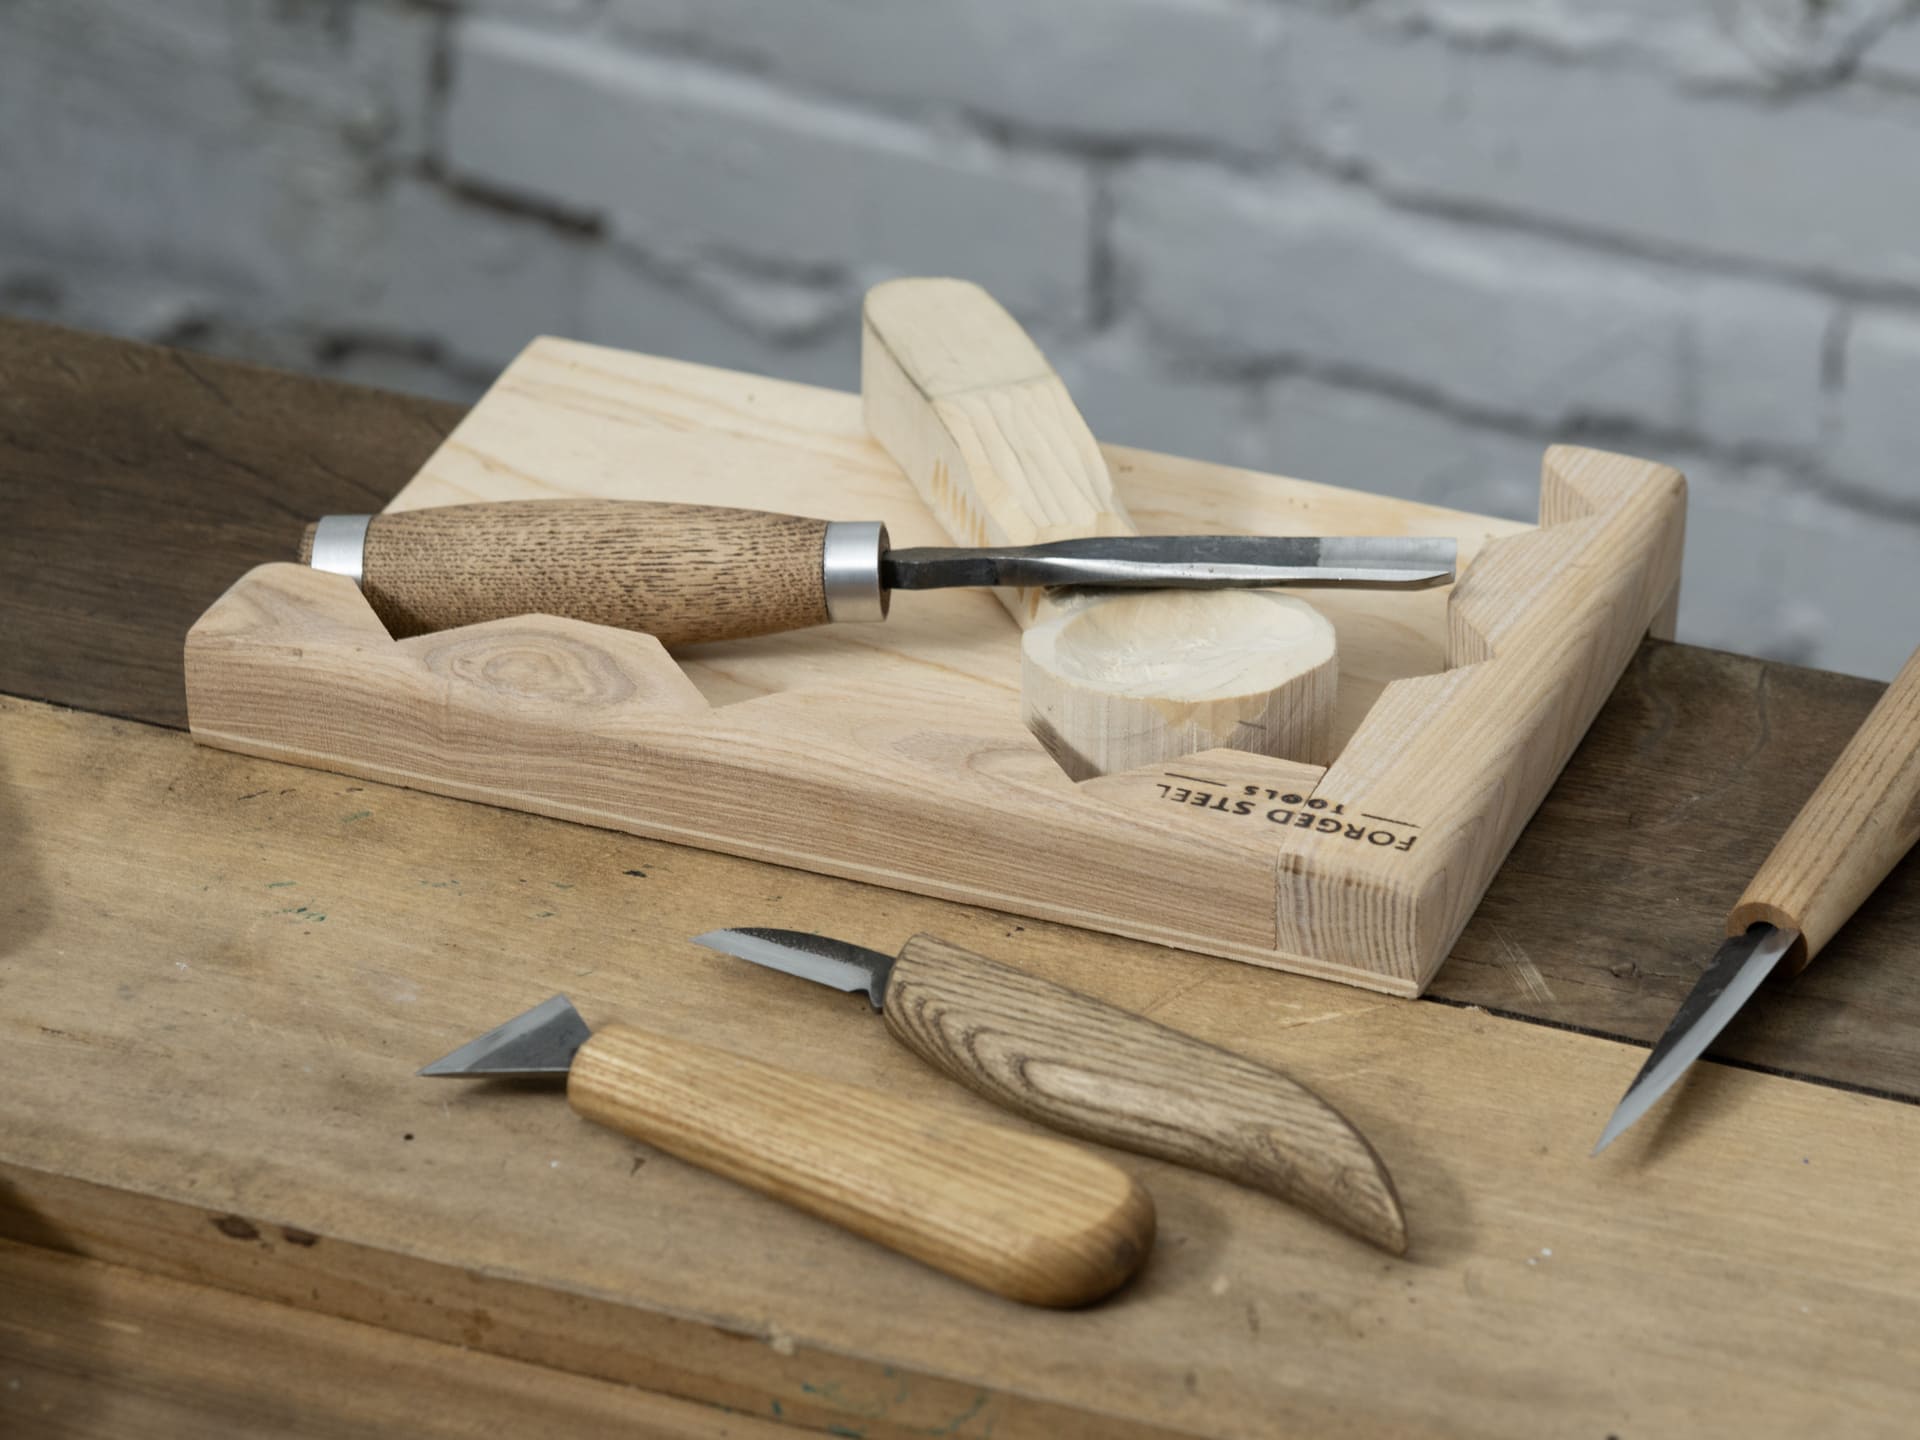
Let’s put it straight: you do not need a pile of wood carving tools to begin. Buying too many carving tools is one of the most common beginner wood carving mistakes.
The best way how to start wood carving is to pick up three or four essentials ➔ choose soft wood (usually, basswood) ➔ practice four basic wood carving cuts ➔ finish a small figure ➔ then expand to new projects.
Your minimal starter kit can look like this:
- Carving knife: A whittling or bench knife with a 1.5-2 inch high‑carbon steel blade.
- Leather strop with compound: To keep a knife blade razor‑sharp while you carve.
- Carving glove: A cut‑resistant glove for your non‑dominant hand for safety.
Basswood (also called linden or lime) is the gold standard for beginner carving. If you want to really understand all the nuances of wood carving basics, basswood is the best choice. It has a fine, straight grain, cuts cleanly, and requires very little force.
Practice these cuts first so they feel natural. That is the foundation of how to wood carve for beginners: push and pull cuts, stop cut, and controlled slicing (more details on them are in the next sections).
Start small with simple wood carving projects that teach shape and grain control rather than large sculptures. A few classic carving designs include:
- Gnomes – Great for learning facial planes and hat shapes.
- Simple mushrooms – Perfect for practicing stop cuts and cylindrical forms.
- Birds – Teach you how to carve flowing curves and follow the grain.
For more inspiration, check out our full guide: 20 Wood Carving Ideas for Beginners. It is packed with approachable carving ideas to help you build skills step by step.
Is Wood Carving Hard for Beginners?
Is wood carving hard overall? It is not as tough as it looks. The learning curve depends on how to get into wood carving the right way. If you want to learn how to carve wood without too much stress, the craft is easy to pick up as long as you focus on three simple things:
- Look for the right wood traits: Instead of grabbing random scrap wood for your first carving art, look for pieces that are soft, straight-grained, and even-textured. Wood with these qualities cuts cleanly like butter and will not split on you unexpectedly. When in doubt, just ask on the forum.
- Take small, shallow slices: A huge part of thinking like a skilled wood carver is knowing how much wood to take off at once. Avoid the temptation to remove big chunks. Shaving off thin layers keeps your knife from getting stuck, helps you feel the direction of the grain, and keeps your hands safe.
- Keep your first carving projects basic: Jumping straight into a detailed, realistic sculpture is a quick way to get overwhelmed. Stick to small, simple carvings that you can actually finish in one sitting. Scoring an easy win early on builds confidence and lets you practice the basic cuts without stress.

Wood Carving Tools for Beginners
The gold standard for wood carving tools is high‑carbon steel (such as 1095 or 52100 alloys) because it takes a razor‑sharp edge and holds it for hours. Cheap stainless options dull quickly, forcing you to push harder. Investing in good high‑carbon carving tools means your blade slices cleanly right out of the box, letting you focus on mastering your technique.
Carving Knife
Beginner wood carving usually starts with one reliable knife. A single, well‑made carving or whittling knife with a 1.5‑ to 2‑inch blade is enough for dozens of small figures. If you are exploring woodcarving for beginners, look for a knife that feels comfortable in your hand and holds its edge longer than stainless steel.
Gouges and V-Tool
You do not need gouges or V‑tools for basic whittling, but they become useful once you learn more advanced carving techniques. A medium sweep gouge clears background wood quickly, and a 60‑degree V‑tool adds crisp detail lines. These tools open the door to wood sculpting, giving you the ability to add depth and texture.
Hook Knife (Optional)
Buy a hook knife if your goal is to carve wood into spoons, bowls, or cups. If you are focusing on figures or geometric forms, you can skip it and put your energy into refining your knife skills with small wooden carvings.
Sharpening Tools (Strop / Stone)
Sharpening is always crucial. Learn to use a leather strop with a polishing compound before your first cut. Touching up your blade every 20–30 minutes keeps it slicing smoothly and makes wood crafting safer.
Safety Gear
At a minimum, wear a cut‑resistant glove on your non‑dominant hand. For your dominant hand, use protective tape or a leather thumb guard. These small steps let you focus on wood carving designs instead of worrying about accidents, and they make experimenting with new things to carve far more comfortable.
How to Use Wood Carving Tools
Using wood carving tools is about leverage and control. When you learn how to position yourself and handle the tools correctly, wood carving for beginners can become a pleasure instead of a struggle. A few simple tips to get you started.
How to Hold a Carving Knife
When it comes to wood carving tools for beginners, the first step is mastering a proper knife grip. Hold a knife firmly with your dominant hand, much like a handshake.

Avoid stretching your index finger along the spine, as it weakens control and tires your hand. Always keep the hand holding the knife in contact with the hand holding the wood. It makes learning how to carve wood a lot safer and maintains stability.
Basic Knife Control
For fine detail when carving wood, use the thumb push: your non‑dominant thumb guides the blade forward while your dominant hand controls the angle.
In a pull cut, keep your thumb safely behind the turning spot. Always slice instead of pushing straight in—this keeps fibers clean and prevents crushing. Practicing these motions builds confidence and sets the stage for easy wood carving projects.
Working With Gouges and V-Tools
Gouges and V-tools open the doors to more expressive wooden carvings. They help you add depth and texture to simple wood carving figures.
When you carve with these tools, use both hands. Your dominant hand drives the handle, and your non‑dominant fingers rest on the shaft to guide and slow the cut. With a V‑tool, take shallow passes to protect its point and keep lines crisp.
Why Sharp Tools Matter
A dull blade is the most dangerous tool in the shop. It forces heavy pressure, and when it slips, it does so fast and unpredictably. A razor‑sharp edge glides through wood carving designs with minimal effort and leaves a polished surface. If your cuts look fuzzy or torn, your knife is crushing fibers instead of slicing them. It is time to refresh the edge so your wood crafting stays clean and professional.
What Is the Best Wood for Carving?
Wood choice can make or break your experience. The ideal wood should let your blade glide smoothly without requiring excessive force. This is one of the first lessons in wood carving for beginners. So what kind of wood is good for carving? We have a few ideas to get you started, but for a more in-depth outline, check out our guide on choosing the best wood for your carving projects.
Best Wood for Beginners (Basswood, Butternut)
- Basswood: The undisputed industry standard. It is soft, has an incredibly uniform density, and a straight grain that cuts cleanly across both the face and the end grain. Because it holds fine details better than almost any other soft wood, it is especially good for everyone learning how to start wood carving. If you have ever wondered what is the best wood for carving, basswood is usually the answer.
- Butternut: Also called white walnut, butternut has a similar softness as basswood. The main difference is its appearance, as butternut has a rich grain pattern that can make a simple wood sculpture project look a little more sophisticated. But it can be slightly more brittle when carving fragile details, so follow careful wood carving instructions to avoid breakage.

Budget Options (Pine, Poplar)
If you are looking to source wood cheaply from home improvement stores, skip the basic construction lumber and head for:
- Poplar: A highly accessible and inexpensive utility wood. While slightly harder than basswood, it has a straight grain, behaves predictably, and takes paint or sand well. For anyone exploring flat wood carving ideas, poplar offers a forgiving surface at a low cost.
- Eastern White Pine: Unlike standard construction pine, select grades of Eastern White Pine are relatively soft and manageable. Just ensure the piece is completely clear of knots. It is a practical option when experimenting with woodcarving patterns, especially for larger projects.
Wood to Avoid as a Beginner
- Construction Lumber (SPF): Common pine, fir, and spruce woods are a nightmare for beginners. Because the grain shifts between soft and hard, your knife can catch and then break free unexpectedly. If you are still learning what wood is best for carving, avoid these.
- Heavily Figured Woods: Avoid curly maple, oak, or deeply swirled grain patterns. The constantly changing grain direction means your blade will tear the wood fibers instead of slicing them cleanly.
- Dense Hardwoods: Keep away from walnut, cherry, or maple until you have mastered your knife control and sharpening routines. Their density requires massive force. Save these for later projects once you have built confidence with softer woods.
Wood Carving Basics You Need to Know
Knowing how wood works and how to handle your knife helps you carve cleanly instead of fighting cracks and splits. These are the wood carving basics every beginner should know, and they form the foundation for anyone learning how to do wood carving effectively.
Understanding Wood Grain
Imagine a block of wood as a bundle of tiny straws running along the tree. The lines you see are the walls of those fibers. They do not always run straight. They may tilt slightly. If the grain lines form V‑shapes or curve upward, that shows you which way the fibers are rising or falling.
Paying attention to grain direction is one of the most important lessons when working with wood carving tools, especially when practicing wood engraving ideas for beginners.
Cutting With vs Against the Grain
Slicing with the grain means cutting in the same direction the fibers run, which feels smooth and easy. Cutting against the grain means going the opposite way: your blade gets stuck under the fibers, lifts them, and can cause the wood to split. If your knife starts to dig in too hard, stop right away.
Turn the piece around and cut from the other side. This adjustment is an important skill for anyone using wood carving tools beginner, and it helps prevent mistakes when shaping a carved wood project.
Removing Wood in Layers
Focus on basic carving techniques by shaving the wood away in thin layers. Start by slicing the square corners of your blank, then slowly round those corners down. Taking thin, paper‑like shavings keeps your blade from getting stuck, protects your hands, and helps you reveal the final shape step by step. This steady approach is the best way to build confidence in beginner wood carving.
Controlling Depth and Pressure
If you use too much strength and the wood starts to creak, the cut is too deep. To control depth, make a stop cut, a straight downward slice, before your knife’s path. The blade will meet this cut and release the chip cleanly, which makes it especially helpful when working on some useful wood carving ideas and prevents these projects from unintentional damage.
Basic Wood Carving Techniques
Wood carving tools for beginners are the starting point for learning control and safety. Once you master these five cuts, you will know how to get into wood carving with confidence.

Push Cut
When you are learning how to use wood carving tools, everything starts with the push cut. Hold the wood in one hand and the knife in the other. Place your thumb on the back of the blade and push it forward while guiding the angle. This is one of the easiest ways to shape small wood carvings.
Pull Cut
When learning how to sculpt with wood with a pull cut, draw the blade toward your body in a squeezing motion, like peeling an apple. Your thumb should press against the wood to guide the cut. This movement offers the needed level of control for organic curves. With this carving technique, you can easily refine delicate wooden carving projects.
Stop Cut
To master the crisp details like the ones you can find in more advanced wood carving art, learn the stop cut. Press the blade straight down to make a line, then slice toward that line from a short distance away. The chip pops out cleanly, and the cut stops the wood from splitting.
V-Cut
For a V-cut, slice into the wood at an angle, then make another cut from the opposite side so they meet in the middle. A triangular wedge will pop out cleanly, leaving a sharp groove. Use this cut to create wrinkles, folds, hair, or lettering.
Hollowing Cut
Use a curved tool such as a hook knife or gouge. Move your wrist in a sweeping motion, starting at the edge and working down into the center. This hollowing cut is essential for carving projects like bowls, spoons, and mugs.
Common Beginner Wood Carving Mistakes
Even with excellent gear, a few common pitfalls can turn a relaxing hobby into a frustrating chore. Avoid these mistakes to protect your hands and tools.
Using the Wrong Wood
- Mistake: Grabbing cheap construction wood or dense backyard hardwoods. Dense hardwoods make you wonder what is wood carving even supposed to feel like if it is this exhausting to cut.
- How to Avoid It: Start with basswood or butternut. When you are just beginning wood carving, these woods are ideal because their uniform density and straight grain make cutting a lot easier.
Buying Too Many Tools Too Early
- Mistake: Purchasing a massive, cheap 20-piece carving set. You may quickly get overwhelmed trying to manage too many profiles, as the low-grade, soft steel in budget kits fails to hold an edge well.
- How to Avoid It: Keep your toolset minimal. Invest in one high‑quality, high‑carbon steel knife and a leather strop. Mastering a single blade first is the key to creating easy wood carvings that look good.
Working With Dull Blades
- Mistake: Waiting until the blade completely dulls. A dull knife forces you to push harder through the wood sculpture, which leads to a loss of control and slips
- How to Avoid It: Treat stropping as a rhythmic part of your everyday wood carving techniques, not a cleanup routine. Pull your blade across a loaded leather strop for 10 to 15 strokes per side every 20 to 30 minutes.
Ignoring Grain Direction
- Mistake: Forcing the knife straight through the wood regardless of fiber direction.
- How to Avoid It: Always read the wood surface before transferring a wood carving pattern or making a slice. If the blade starts to dive too deep or the wood splits, stop immediately, flip the block 180 degrees, and cut down smoothly.
Starting With Complex Shapes
- Mistake: Trying to carve a detailed face or complex relief as your first project.
- How to Avoid It: Begin with simple wood carving designs like a flat-plane comfort bird or a basic gnome. Learning to slice a square corner into a clean, simple 3D shape builds the exact muscle memory you will need for advanced work later.
Share:
20 Wood Carving Ideas for Beginners
What Is a Hook Knife and How Do You Use It?