


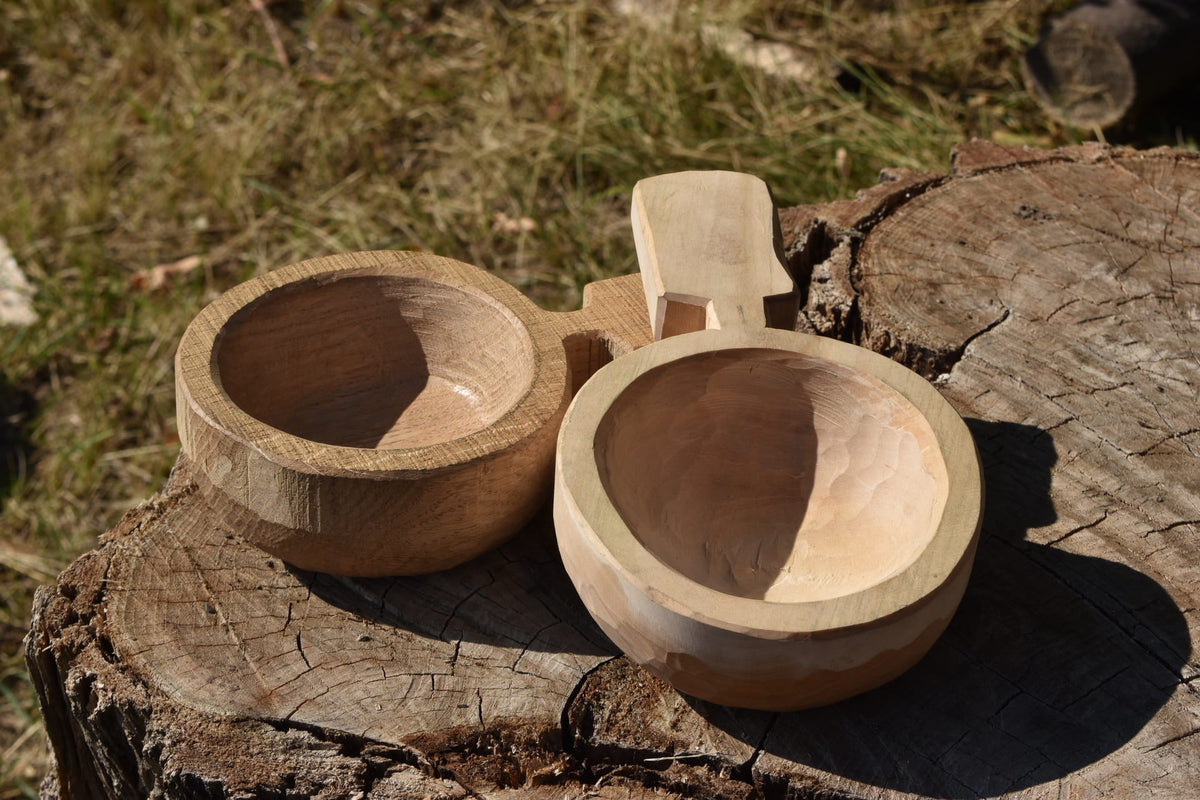
What You Need Before You Start: Bowl Carving Tools
Learning how to carve a bowl by hand, like any other hand carving project, is a really satisfying thing to do. Unlike bowls made on a lathe, carving wooden bowls gives each piece its own character. Every cut leaves a mark that shows the process and the hands behind it.
Essential bowl carving tools for hand carving
A complete set of bowl carving tools can roll up into a canvas pouch and cost less than a basic table saw, making bowl carving accessible to almost anyone.
- Hook Knife (Spoon Knife): Its curved blade reaches into tight spots, scrapes smooth interior curves, and cleans areas that a straight knife cannot. This is one of the most important wood carving tools for fine detail.
- Straight Carving Knife: A versatile tool for shaping the outside, trimming rims, and making precise cuts when carving a bowl by hand.
- Gouge (Medium Sweep): A deeply curved chisel used by hand or with a mallet. This carving gouge is ideal for hollowing, leveling bottoms, and cutting through tough end-grain.
- Mallet: A solid wooden mallet works with gouges to drive deep cuts safely, allowing you to work dense wood without straining your wrists.
- Carving Axe or Hatchet (Optional): Best for rough shaping. It splits logs, removes sapwood, and quickly forms the outside before finer tools take over. This step makes hollowing wood faster and more efficient.
Bowl carving knife vs hook knife: do you need both?
The choice between a bowl carving knife and a hook knife depends on the scale of your project. For small vessels, one tool may be enough, but for larger bowls, using both together makes the work more efficient and precise.
- Curve and Edge Shape: Standard hook knives have tight curves that tend to catch in wide bowl shapes. Bowl knives have broader curves and angled edges designed to glide smoothly across wide interior surfaces.
- Leverage and Reach: Hook knives have short handles made for quick, single-handed wrist turns. Bowl knives feature longer handles that let you use both hands and your body weight to push through tough wood.
- Grain Control: When carving a wood bowl, hook knives work best for cleaning up rims and side walls, while wood carving bowl knives let you take sweeping cuts across the bottom without tearing the wood fibers.

Choosing the Right Wood for Carving Bowls
When you learn how to carve a wooden bowl, think about how the piece will be used, how much moisture the log holds, and how the grain runs through the carivng blank.
A functional salad vessel needs dense, non-toxic hardwood that holds up to moisture and oils. For a decorative piece, pick softer woods.
Assess internal tension: branch timber might look convenient, but trunk sections are much more predictable.
Finally, check for defects like rot, bark inclusions, or knots before carving wooden bowls, because a sudden shift in grain direction can cause the knife or gouge to slip.
Best wood species for bowl carving by hand
You can experiment with any timber you find in your yard or shop, but some species make bowl carving much easier. We suggest the selection below as the most common choices for hand carving, especially if you want options that build confidence without tiring out your arms.
- Basswood: Basswood is known to be the softest and most forgiving material. Its faint grain structure will not fight your hand tools. But it lacks a strong visual figure, and it easily absorbs moisture and food stains if you plan to use the piece in the kitchen.
- Butternut: Butternut or white walnut runs slightly denser than basswood, but it gives you a soft, buttery feel under the knife. It has a warm grain pattern, and you can comfortably shape it when seasoned without a heavy wooden mallet.
- Cherry & Walnut: These hardwoods are for those who already have good blade control. They require more force and very sharp edges, but their tight grain leaves clean tool marks and slowly builds a warm, natural finish as the wood ages.
- Green (Wet) Wood: Freshly felled logs contain high moisture levels. Working with green wood keeps the fibers soft. You do have to use a controlled two-stage drying process to keep the rim from cracking as it cures.
Green wood vs dry wood for bowl carving
One of the golden rules for anyone exploring how to carve a bowl out of wood is that wet timber goes along with your tools instead of resisting them, while dry wood takes much more effort.
|
Factor |
Green Wood (Wet) |
Dry / Seasoned Wood |
|
Fiber Resistance |
Fibers cut easily with an adze, hatchet, or gouge. Heavy mallet strikes are rarely needed, which makes wood carving for beginners less tiring. |
Dense fibers resist hand tools, so you may need stronger mallet blows and steeper bevels. |
|
Wall Thickness |
Carve walls thick (about 10% of the bowl’s diameter) so they can warp safely while drying. This is a common step when carving bowls from fresh logs. |
You can carve to thinner walls without worrying about distortion. |
|
Drying and Tension Control |
Wood shrinks unevenly as it dries, so it must be dried slowly (in paper bags or packed in wet shavings). |
Bowl carving from dried wood means the shape will stay exactly as carved. |
How to Carve a Wooden Bowl Step by Step
The secret to how to carve a bowl by hand without splitting your wood is following the wood grain and working systematically from the outside in. Shape the exterior first, then hollow the inside to maintain an even wall thickness and prevent cracking.

Step 1 — Preparing and marking your blank
- Start with green wood. Cut a block about 6–10 inches wide and 2–4 inches tall. Remove the pith right away, or it will split your bowl as it dries. It is a very crucial first step in wooden bowl carving.
- Flatten the top with a hatchet or drawknife. Mark the rim and cavity with a compass, then add centerlines to keep symmetry. These layout marks are especially useful in wood carving for beginners.
Step 2 — Shaping the outside of the bowl
- Take a gouge and cut with the grain. Work from rim to base so you do not risk tear-out.
- Thin the outside walls now. If you leave them too thick, hollowing later will be harder than it needs to be.
Step 3 — Hollowing the bowl with a hook knife
- Hold your hook knife firmly and secure the blank with a clamp.
- Start carving in the middle of the blank, cutting across the wood grain to establish the deepest point of the cavity.
- Use a pull stroke driven by your shoulder for heavy material removal. Switch to a push stroke using your non-dominant thumb on the blade spine for controlled cuts.
- Hollow the cavity from the center pocket toward the outer rim.
- Stop frequently to measure the walls using a pinch test or calliper. Aim for 6–8 mm thickness. That is a safe margin for anyone figuring out how to carve a wooden bowl.
Step 4 — Refining the shape and smoothing the surface
- Use a sharp gouge to clean the inside cavity.
- Trim the rim with a straight knife until the curves look right.
- Leave some tool marks if you like the handmade look. For everyday use, apply a food safe finish so the bowl is ready for serving if you intend to use it as a kitchen utensil. That is the final touch in bowl carving tools practice.
How to Finish a Hand-Carved Wooden Bowl
Finishing needs a bit of planning, especially since wood behaves differently depending on whether it is still green or fully dry. Keep utility in mind from the very beginning, especially when thinking about how to carve a bowl that will stand up to daily meals and regular washing.
Sanding vs leaving tool marks: two approaches
The finish you choose depends on your style and how you plan to use the piece:
- Folk Art Style (Tool Marks): Traditional greenwood methods, like the ones you practice during spoon carving, rely on sharp tool edges. Leaving crisp knife or gouge facets keeps that authentic texture alive.
- Smooth Finish (Sanding): Working your way up from coarse sandpaper to a fine 400-grit after shaping the wood with a reliable carving knife gives you a sleek feel. This style works best if you want a smooth, comfortable grip for daily use, especially if you learned how to carve a bowl by hand using only edge tools.

Food-safe finishes for carved wooden bowls
Kitchen pieces need the right protection. Skip chemical stains and polyurethane because they can flake or release toxins under cutlery. When you finish up any wood bowl carving, keep these safe options in mind:
- Pure Tung Oil: This natural oil soaks deep into the wood fibers and cures into a hard, waterproof seal. Just make sure to use genuine tung oil and check that the bottle says 100% pure without extra varnish driers, as many experienced makers who rely on specialized bowl carving tools will tell you.
- Food-Grade Mineral Oil: A simple coat of mineral oil stops the wood from drying out and cracking. It does not cure permanently, so you will need to reapply it from time to time.
- Beeswax Finish: Melt down some beeswax with mineral oil to create a quick board butter. It seals the surface nicely, adds a soft matte look, and fights off moisture.
- Walnut Oil: This traditional oil dries well and brings out deep grain contrast. Leave it out when making the piece for someone allergic to walnuts.
Common Mistakes When Carving Wooden Bowls by Hand
If you want to get better at how to carve a bowl, pay attention to the common traps. Knowing them saves you frustration later.
Uneven walls and how to check thickness as you go
Uneven walls can be the biggest headache. They often lead to weak spots or accidental holes. Keep these three checks in mind as you work:
- The Light Test: Hold the rough-out bowl up to a bright window or a shop lamp. Thin spots glow much brighter and show you exactly where to stop cutting. If you need a reliable guide on how to carve a bowl for beginners, this visual trick really helps.
- Finger Feel: Pinch the wall between your index finger on the outside and your thumb on the inside. Move your hand systematically across the entire bowl to feel for thick sections.
- Calipers: Use outside and inside calipers to measure wall thickness before you do any final smoothing. Anyone who loves traditional hand tool woodworking knows these checks are what keep the piece strong.
Grain direction errors that cause tear-out
Tear-out happens when your gouge or knife moves against the grain, ripping fibers out below the surface. Understanding this behavior is the real secret to how to hand carve a wooden bowl without leaving a fuzzy mess.
- Reading the Grain: Look closely at the growth rings and the direction of the wood fibers on the sides of the bowl. Think of the grain like roof shingles, always guide your edge downhill with it.
- Changing Direction: If the wood looks fuzzy, stop immediately. Reverse your cutting direction, lower your blade angle, or pick up a different blade from your set of wood bowl carving tools to slice across the fibers smoothly.
Share:
What Is an Adze and Should You Add One to Your Carving Kit?