What Is Wood Carving for Kids and Why It’s Worth Trying
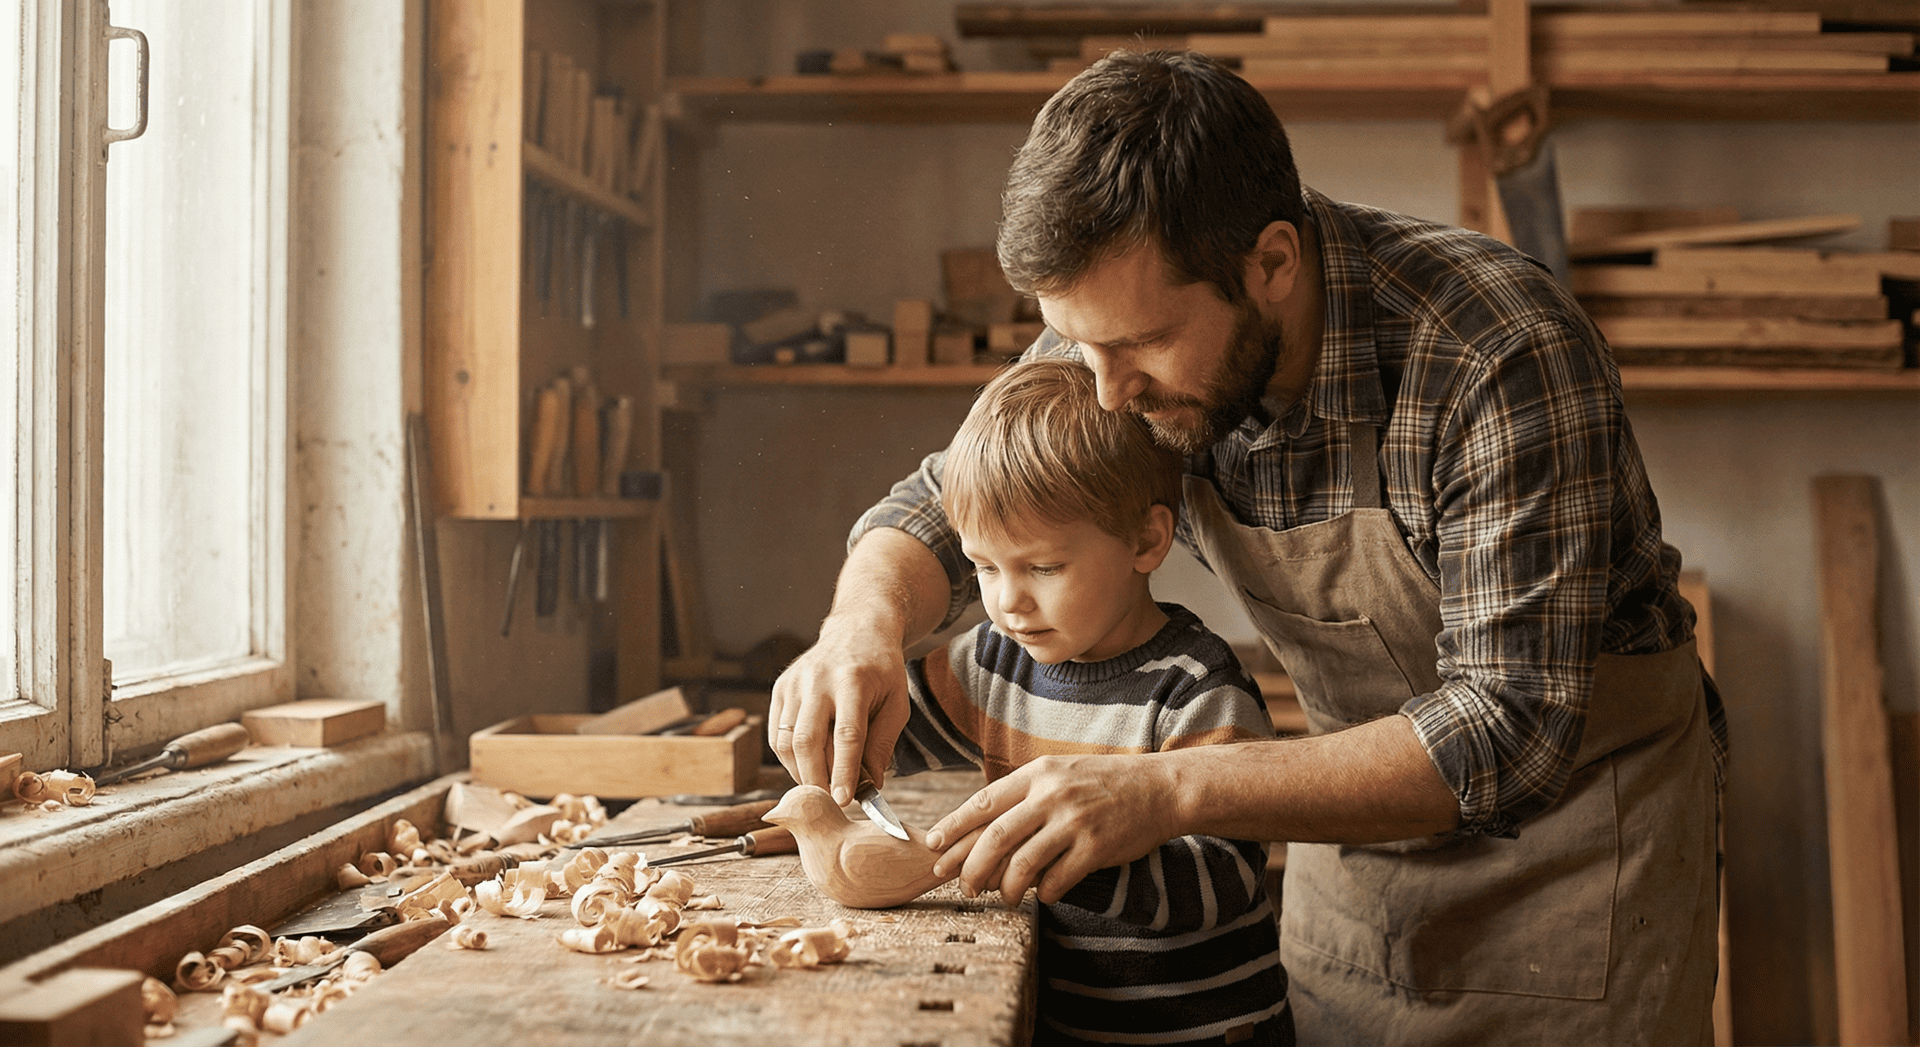
Wood carving projects can be a fun hobby for kids as well as adults. As a parent, you might feel a little cautious about introducing wood carving for kids, especially since it involves knives or whittling tools. With the right guidance, though, carving helps children build focus, learn safety, and gain confidence. The experience can be especially enjoyable when you collect wood together and begin with something simple, such as green woodworking projects or carving from pre‑shaped blocks.
Benefits of carving for kids: focus, creativity, patience
Unlike activities with rigid, step‑by‑step instructions, carving gives kids the freedom to explore. A project might begin as a whistle but turn into a small animal if the wood grain points them in a new direction. That kind of flexibility teaches problem‑solving and sparks creativity, making easy wood carving ideas a perfect way to start.
Wood carving projects also build patience. It is not a quick process, and children soon realize that rushing only leads to mistakes. Instead, they learn the value of slow, steady progress, especially when working carefully with a carving knife to shape their designs.
In our screen‑heavy world, the simple act of shaping a block of wood into something new feels refreshing. Kids learn to plan each cut, notice the grain, and guide their tools with care. This focus sharpens their attention and helps quiet busy minds, while experimenting with different patterns adds variety and keeps them engaged.
Whittling for kids helps strengthen fine motor skills through careful, hands‑on practice. Children might start with something small and gradually adapt to adding fine details where simple figurines or playful ghosts come to life.
How wood carving projects differ from other crafts (LEGO, drawing, clay)
When kids build with LEGO, draw with pencils, or shape clay, they follow a familiar process. But wood carving for kids feels different. It is slower, more hands‑on, and teaches patience in a way other crafts often do not. Unlike other hobbies, carving for kids brings a whole set of fresh experiences:
- Creating by cutting away: Most crafts are additive — you stack LEGO bricks or add clay to a sculpture. Wood carving flips that idea. It is about “finding” the object inside the block by shaving off thin slices. Kids learn to see raw materials differently and imagine the hidden project beneath the surface.
- Developing a feel for the material: Wood is not the same as paper or plastic. Beginners learn to notice knots or small defects that can change their project. They also start to “read” the grain, which shows how the blade should move and how strong the finished piece will be.
- Bridging 2D and 3D: Carving builds on skills kids already know. They can take drawings or patterns from their sketchbooks and place them onto wood. These outlines work like a guide, helping them turn flat ideas into three‑dimensional basic shapes.
- The art of the happy accident: Once a piece of wood is cut away, it cannot be replaced. Kids learn to adjust their design and see that a “wrong” cut can turn into a new idea.
- Finding a flow state: Carving uses sharp tools, so it needs full attention. Even small wood carving ideas, like making a simple figurine, can bring peace and a sense of achievement.
Safety First: How to Make Carving for Kids Safe and Fun
Every carving session for a child should bring positive emotions and a sense of achievement. To encourage them to keep developing their skills, it is paramount to make each experience as safe as possible. Simple rules, proper gear, and age‑appropriate projects help ensure that wood carving projects always remain enjoyable and secure.
Basic rules parents must set before the first cut
Before starting wood carving projects, parents should set clear safety rules. The most important is whittling means sitting. Kids must sit or kneel with both feet flat to stay balanced.
Another key rule is the blood circle. A child stretches out their arm and turns in a circle; if anyone enters that space, carving stops immediately.
Parents should also explain sheath or close: a knife is never left open or passed without being folded or covered.
These habits remind kids that carving is serious work, not play, and that full attention is always required.

Essential safety gear for wood carving for kids (gloves, thumb guards, glasses)
Safety gear provides extra protection. For whittling for kids, the most important item is a cut‑resistant glove worn on the hand holding the wood.
The hand holding the knife should use a thumb guard or safety tape to stay safe during push cuts.
Safety glasses are also recommended, since even small chips can hurt the eyes. Gloves and glasses must fit properly, because oversized gear makes carving harder and less effective.
Age-appropriate expectations: what a 6–8, 9–12, 13+ year old can do
Readiness for wood carving projects depends more on focus and maturity than age, but milestones help guide parents, so here are just a few suggestions:
- Ages 6–8: Begin with peeling sticks to practice safe motions. The knife should have a rounded tip, and sessions should be short with regular breaks.
- Ages 9–12: Kids can try soft basswood blocks and bring small wood carving ideas to life, such as simple animals or geometric shapes. They can learn different grips and follow step‑by‑step plans with supervision.
- Ages 13+: Teens often have the skill for full sets of tools. They can move from simple whittling to more detailed projects like bowls, wooden utensils decorated with chip carving patterns, or carved faces. At this stage, they should also learn to care for their tools, including sharpening blades.
Tools and Wood for Beginner Wood Carving Projects
Like with beginner adult carvers, kids should start small with some easy wood carving ideas. Beginning with simple projects makes the process fun and safe. To keep the experience enjoyable, children only need one starter tool and a well‑organized carving space where they can focus, learn, and build confidence step by step.
Safe starter tools vs full carving sets
When introducing a child to wood carving for kids, it is best to start with one tool, such as a pocket knife. Limiting the tools helps children focus on learning how a single blade works and how the wood responds. Mastering one knife builds muscle memory before moving on to bigger sets.
For safety, the knife should meet a few key requirements:
- Beginners may benefit from a rounded tip to avoid accidents, while older kids can use a pointed tip for more detail.
- The blade must stay sharp. A dull knife needs too much force, which can slip and cause injury. A sharp blade makes smooth, controlled cuts.
- A kid‑friendly carving knife should have a safety guard and a handle sized for small hands.
Best soft woods for children (basswood, pine, linden, etc.)
Soft woods are the best choice for carving for kids because they are easier to shape and make the experience more enjoyable.
Popular options include:
- Green wood: Fresh branches are soft and easy to carve, perfect for whittling sticks.
- Basswood (linden): Known as the gold standard, it has a fine grain and is great for detail work.
- Pine: Affordable and soft, though its uneven grain and sticky resin can be tricky.
These woods allow kids to practice basic shapes without struggling against hard material.
Setting up a kid-friendly carving space at home or in class
A safe space is just as important as the tools. Children should sit at a stable table with both feet flat on the floor. Creating a “safety circle” around the carver keeps others at a safe distance. Posters or checklists can remind kids of proper grip and safety rules.
Tools should be stored in protective sheaths when not in use. A bench hook or wooden stop can hold the project steady, keeping both hands behind the blade. A tray or tarp under the table makes cleanup easy and prevents shavings from becoming a hazard.
Easy Wood Carving Ideas and Small Wood Carving Ideas for Kids
The first steps in carving for kids should focus on exploring how the wood feels and responds, rather than rushing to complete a finished piece. Early practice is all about building control. Let’s look at some simple cuts and shapes children can start working on.
Super simple shapes for first tries (chips, lines, textures)
Beginners should start with basic cuts like the push cut and paring cut. A great first exercise is carving small triangular chips, which helps them learn blade control and depth.
Practicing lines and textures is also important. Kids can carve parallel lines to look like hair or fur, or cross‑hatching for patterns.
These simple drills show how wood reacts in different directions. The main lesson is that small, controlled movements are safer and more effective than trying to remove large chunks.

Small wood carving ideas: pendants, name tags, keychains
Once kids are comfortable with cuts, they can move on to small wood carving ideas that feel rewarding and personal.
- Pendants: Simple shapes like teardrops or leaves are great practice. After carving and sanding, an adult can drill a hole for a cord.
- Name tags: Flat blocks are perfect for practicing line carving. Kids can carve initials or names, learning precision and control.
- Keychains: These can be carved into geometric shapes or small animals. Keychains are a fun way to teach finishing techniques, such as using natural oils or beeswax to protect the wood.
Turning nature finds (sticks, branches) into easy wood carving projects
The backyard or a local park can provide free materials for easy wood carving ideas. These projects encourage children to look at natural wood creatively, seeing hidden shapes.
- Magic wand: Kids can peel off bark and carve a tapered point or swirls. This is a great way to practice long, smooth push cuts.
- Walking sticks: Older children can carve textures or simple spirit faces into the handle.
- Nature characters: Y-shaped branches can become slingshots or little wooden people. Adding paint or markers makes them even more fun.
Wood Carving Projects by Age and Skill Level
Starting kids on wood carving projects works best when you have a clear plan. It helps avoid introducing complex tasks too early and gives you a way to track which exercises were successful and which need more practice.
Starter carving methods for young beginners (simple cuts, chip carving patterns)
Young beginners should start with three basic safety cuts:
- Push cut: Use the thumb to guide the blade for control.
- Stop cut: Press the blade straight in to create a wall and define shapes.
- V‑cut: Make two angled cuts that meet in the middle to form patterns or textures.
Chip carving with small triangular cuts is also a great way to build precision and confidence.
Intermediate wood carving styles for older kids (relief, simple figures)
Once the basics are mastered, children can move on to more creative projects:
- Relief carving: Carve designs onto flat boards, using a V‑tool to outline drawings.
- Simple figures: A classic gnome made from basswood is a fun first figure.
- Carving kits like these: Using precut blocks helps kids focus on technique rather than shaping the wood from scratch.
How to help a child move from “try once” to a long-term carving hobby
Ultimately, the goal is to make carving enjoyable enough that kids want to keep coming back to it. To keep them engaged, connect carving to things they already enjoy:
- Create favorite characters or superheroes.
- Make personalized gifts like hearts or letter openers.
- Add paint or color to finish projects.
- Collect sticks on nature walks for whittling for kids.
- Display their work at home to show progress and celebrate achievements.
Share:
Types of Wood Carving and How to Choose Your First Style
What Is Chip Carving and Who Is It For?